Simple Cold Tofu – 冷豆腐

Cold TofuHappy Easter everyone! It’s sunny and I’ve had a pretty eventful and relaxing break. What more could you ask for? House parties, brunch, museums, coffee, catchups, drinks, potluck, cleaning, DIY, bookkeeping….*tick tick tick tickety tick*

So my excuse for the lack of posting was that I was actually in the Alps snowboarding and drinking hot wine with friends in this beautiful winter wonderland magical paradise. I’m not going to lie, it was amazing and sadly I’m already starting to forget that delicious feeling of breathing in frosty air. Prior to my week off in the snow I went to nutritionist who not only put me on a probiotic replacement therapy course, but also kindly informed me that I should avoid wheat and dairy for a month…to which I simply replied:

“But, I’m going to France!”

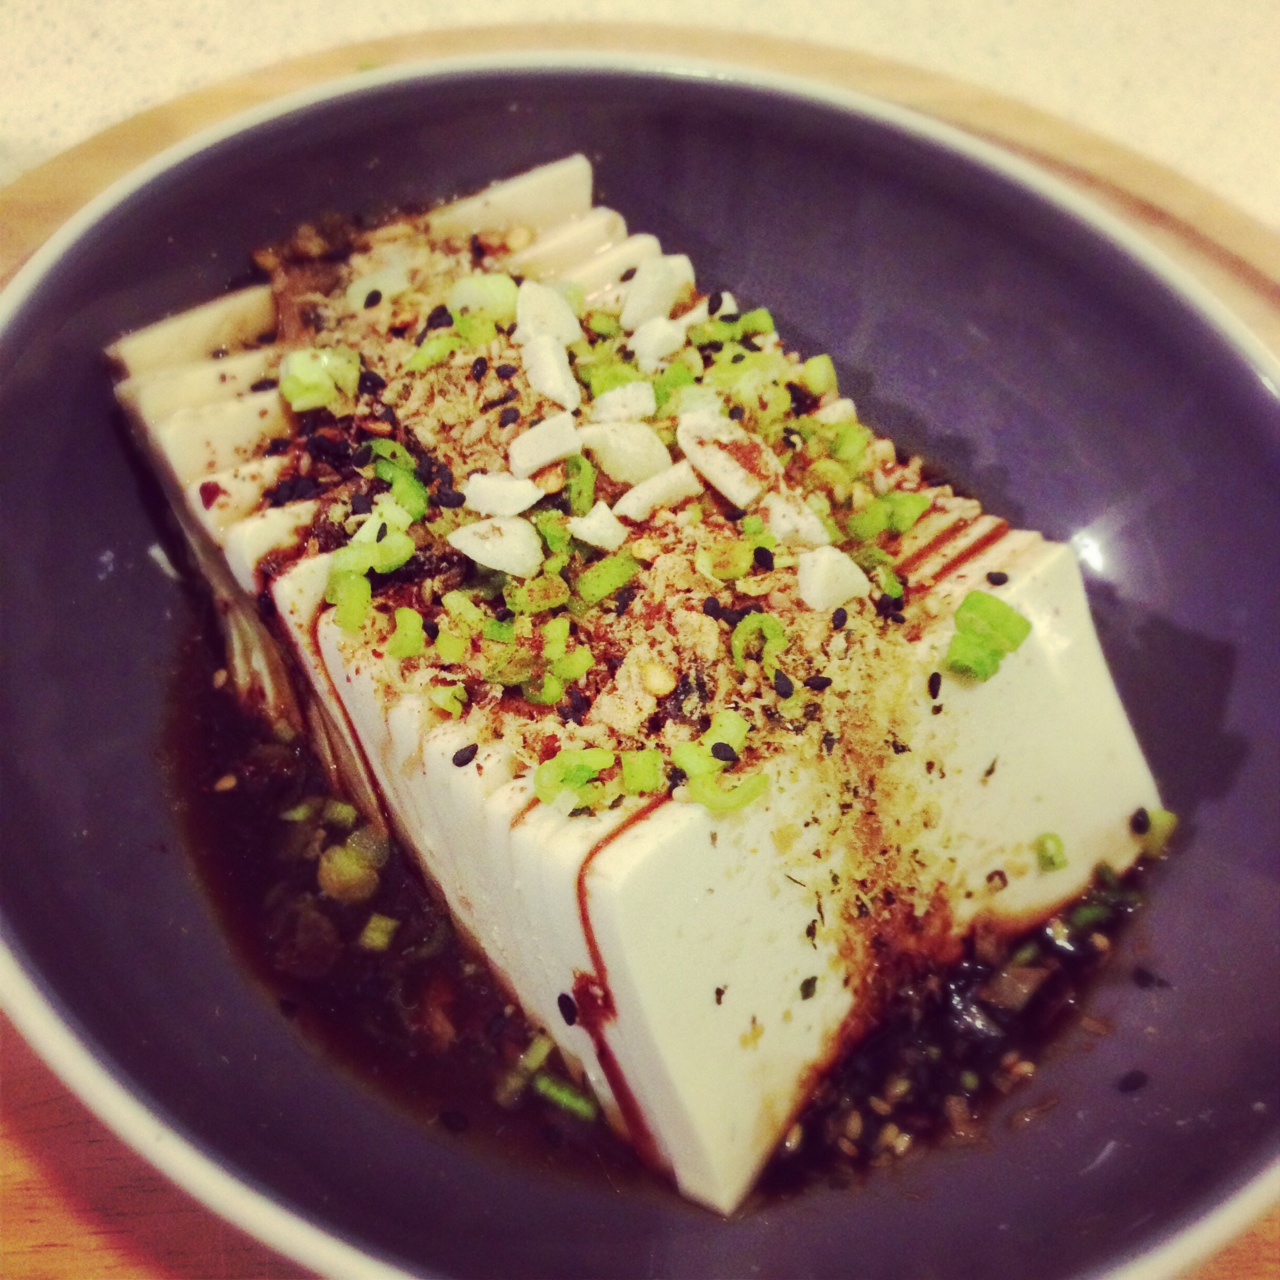
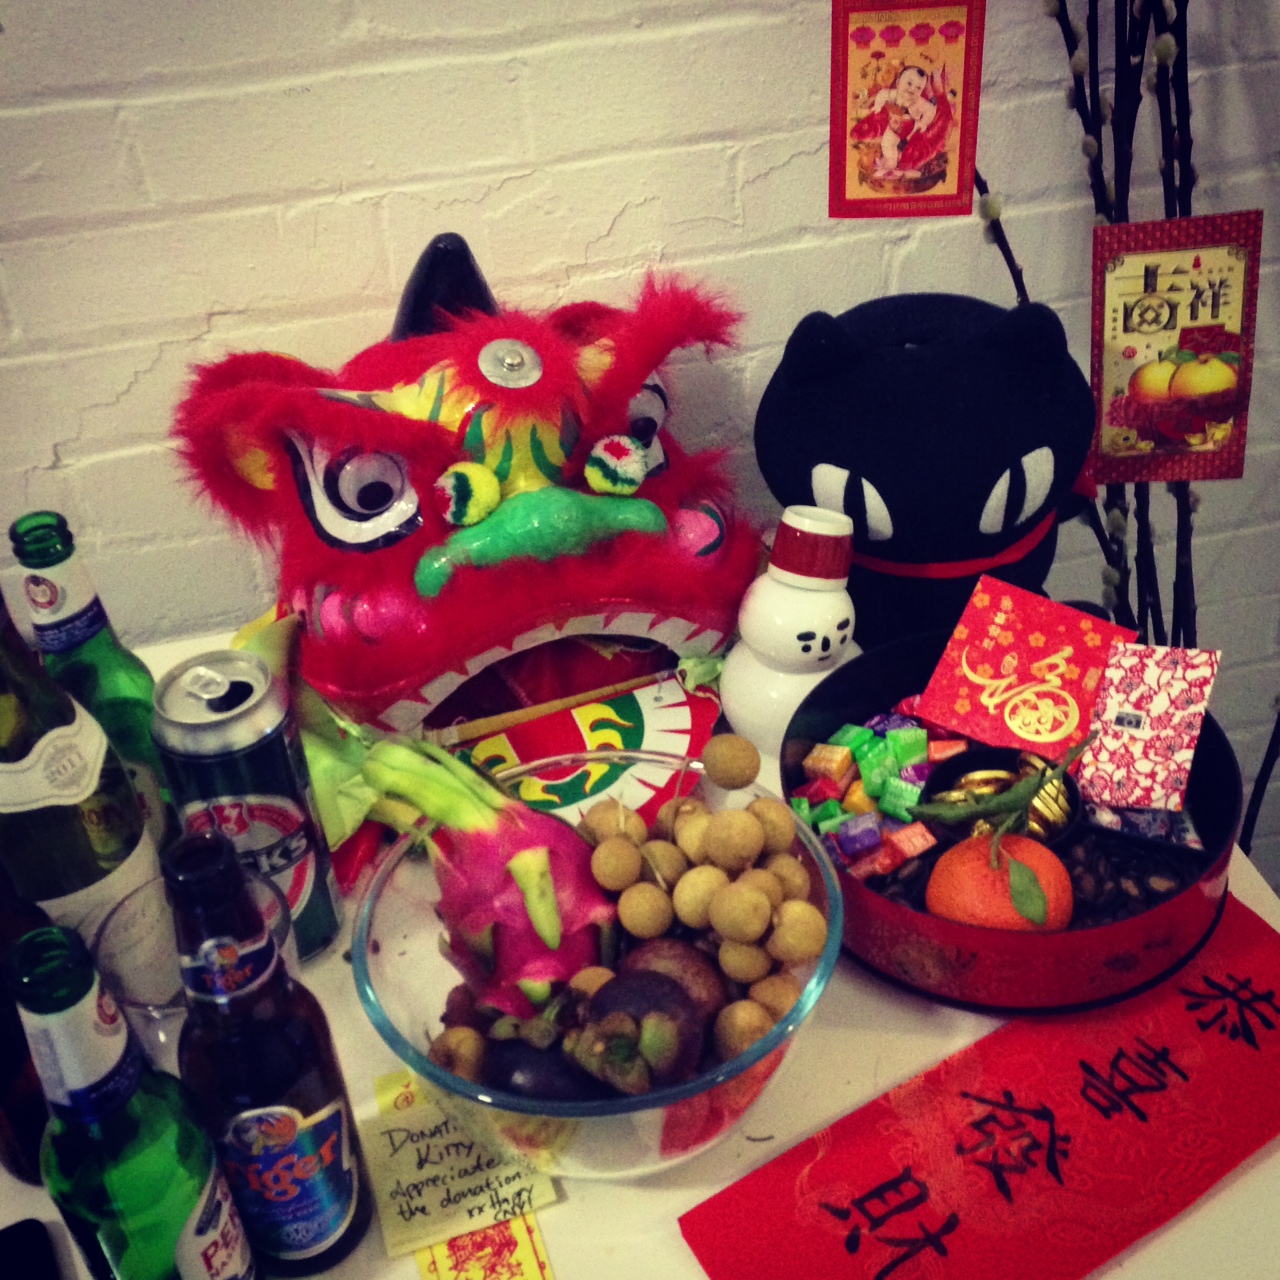
It was tough, but I think I did alright (a mad crazed fondue incident aside). Which brings me neatly (not really) to this popular tofu dish that I make all the time, which made not one but three appearances during my Chinese New Year shin dig. And happily for others out there who are vegetarian, wheat and dairy intolerant, you too can make and consume this dish.

Simple Cold Tofu:
A packet of silken tofu - firm or soft good
Spring onions - finely chopped
2 tbsp light soy sauce (GF if poss)
2 tsp dark soy sauce
(GF if poss)
2 tsp Sesame oil
1/2 tsp Fresh ginger - grated
1 tbsp mushroom floss
pinch chilli flakes or fresh chilli
pinch sesame seeds
1 tbsp roasted peanuts - crushed

If you have time to kill, the following will make the tofu even silkier and remove some of that out-of-a-box taste. It’s not necessary, but it’s nicer. Get it out of its packaging and place it on a small plate. Boil a pot of water with enough water to submerge your tofu. Once boiled, remove the pot from the heat and submerge the tofu and plate for 20 minutes. Drain, and set it aside to cool. You can put it over ice, or whack it in the fridge, it’s up to you.

When you’re ready to serve, slice the tofu thinly, drizzle with the soy sauces and sesame oil, get the spring onions on. Add the chilli, grated ginger, sesame seeds, peanuts and mushroom floss*…

*Okay, I probably need an aside is needed for this little addition. This is the vegetarian version of ingredient that for health/religious reasons my mum no longer really eats so I get gifted the veggie version whenever I go back to Hong Kong. But for those of you relatively au fait with Chinese or Thai snack foods, the following statement is irrefutable: Pork floss is delicious.

If you have never heard of pork floss, it is *exactly* as it says on the tin. It’s seasoned pork that’s spun into a savoury meaty candy floss. I don’t know how they do it, but it’s that kind of black food magic which makes the world go round. Go try some. Preferably on those moorish spicy rice crackers…who do I know in Thailand at the moment to get me some?…who…do…I…

…hang on. Sorry I got side tracked. Basically, you get it. This tofu dish is supremely adaptable. If you’ve got your three main flavours of soy, sesame oil and spring onions, you can add essentially anything you want. Be it crushed garlic, a splash of black chinese vinegar, a raw quail egg, natto, grated yam, umeboshi, grated carrot, a thousand year old egg, coriander. Maybe not everything I’ve listed at once. Experiment and make some: it’s simple.

Red Cooked Beef Shin – 紅燒牛腱

red-cooked beef shin

Whenever my mum throws a party, there are staples that family and friends expect to be served. Of these are drunken chicken wings, and red-cooked beef shin or turkey gizzards (which may sound totally horrific to those uninitiated, but my god, gizzards are delicious). So this Chinese New Year I decided on the beef shin and found myself making a large pot of aromatic red broth to braise my meat. I actually tried to source some turkey gizzards, but I think all the local butchers I called around thought I was a bit loopy. Oh gizzards. I shall find you one day.

I remade this again last night because my guests who were as quick and hungry as gannets gobbled it all up before I could take a picture. I doubled this amount to be a bit of a nibbly appetiser for around 20 people. So, below will probably be a starter to serve 4?

Red Cooked Beef Shin:
700 g beef shin
5 or 6 shallots - roughly chopped
1 tbsp vegetable oil
Peel of an orange
2.5 cups cold water
1/2 Shiu Hing (brown) cooking wine
1 cup light soy sauce
3 tbsp rock or granulated sugar
1 tbsp Sichuan peppercorns
1 tbsp star anise
1 stick of cinnamon
1 tbsp whole cloves
1 tbsp fennel seeds
1 tsp liquorice powder
A drizzle of sesame oil to serve

Get a colander in the sink. Rinse the meat in cold water, trim some of the outer fatty bits if you must. Then take some boiling water and douse the meat to seal it a bit.

Chop your shallots fry them in a bit of vegetable oil until fragrant – remove and save for later. With a peeler, peel the orange rind off in one long spiral. Now get a pot and put the water, soy, sugar, shallots, orange peel and and spices (basically all the ingredients but the sesame oil) into it. You want the pot small enough that when you add the beef it is completely submerged in the braising liquid.

Shin in and bring it to a boil, after 5 mins turn the heat right down to a simmer. Notes from my mum said ‘braise for at least 40 mins until tender’. I ended up simmering it for 2.5 hours. You want to check the water level is always submerging the meat, and maybe flip it around every so often so all sides get infused with the flavour. Check tenderness with a skewer, it should be soft enough to melt in the mouth but still have structure when you slice it.

The absolute best thing about slow cooking with shin is the ribbons of tendon and fat which render down into impossibly guilty deliciousness. You can just about see the marbling in the photo above.

Once tender, remove the beef from the braising liquid and let it rest for 15 minutes. Now thinly slice against the grain of the meat and serve with a drizzle of sesame oil and a splash of the red braising broth. If I were to be a bit more organised about this, I might even scoop some of the red broth out into a smaller pot and reduce it down into a thicker dipping sauce. So maybe you wanna do that if you have time.

Spicy Chinese Pickled Cabbage

Spicy Chinese Pickled Cabbage

Happy Year of the Snake everyone! Last week my little kitchen was burning the candle at both ends to get some delicious treats out for a CNY party last night, which I literally decided to throw on Monday. A surprising amount of people agreed to come considering the late notice, it being a Sunday and the snow, so a warm glowy feeling was had by ushering the new year over great food and friends. As per usual at my foodie parties, people had to be rolled out, so the following posts here at Minikin Kitchen will really be me catching up with what I cooked throughout the week ending with the on the day dumpling making sessions. Ahhh…Chinese New Year. I love you.

So. Let’s start with this spicy, sour and slightly sweet offering of chinese pickled cabbage. My veg box last thursday happened to contain Chinese Leaf (or Nappa Cabbage across the pond) as well as carrots. Serendipitous or what?  You can if you want substitute the Chinese leaf with a head of regular white cabbage, which will result in a firmer bite.

Pickled Cabbage:
1 large Chinese leaf cabbage - cut into 1.5 inch squares
2 carrots - thinly sliced into half moon shapes
4 fresh bird's eye chillies - deseeded and thinly sliced
1-2 inch piece of ginger - thinly sliced
1/2 tsp Szechuan peppercorns
1 cup of rice wine vinegar
1/2 cup granulated sugar
2 tbsp rice wine (the clear one)
1 tbsp salt

This is pretty easy side dish to prep in advance. Cut and put all the veg in a large tupperware box or jar, anything with a lid strong enough for you to shake everything up.

Heat up the vinegar and dissolve all the sugar and salt. Once it’s all dissolved add the rice wine and the peppercorns. Now add this to all the veg and shake it all up. The veg will shrink in volume over time adding loads of water to the mixture. What I ended up doing is whacking it all in a big Kilner jar and every morning and night rotate and stand the jar upside down (or right side up) to shift and coat it all. I made this on the Thursday evening and did a taste test Friday evening, so these quantities are the results of my adjustments.

Serve it up using a slotted spoon or chopsticks, you don’t want to serve it swimming in the pickling liquid. It does have a spicy kick, and although my friends enjoyed it, I’d start with 2 chillies and do a taste test a day or two in. I really like spicy food, but I’m into enjoying food not enduring it.

CNY 2013

Crusted Pumpkin with a Yogurt Dip

Crusted Pumpkin

It’s the first week back to work for me, and boy has 2013 started off with a bang. I feel like I’ve had the hit the ground running from the airport since arriving back from Hong Kong. It’s also really rather cold in London compared to the shockingly low temps of 11°C I had to endure over the holiday so all I want to eat is warming comfort food. Amazingly I had all the ingredients for this at home, plus it uses up breadcrumbs that tend to sit around forever in the cupboard. What’s not to like?

Crusted Pumpkin:
a small pumpkin
A large handful of grated parmesan
A smaller handful of panko breadcrumbs
A handful parsley - finely chopped
1 tbsp dried oregano
1 tsp paprika
1 tsp cayenne pepper
Zest of a lemon
1 garlic clove
3 tbsp olive oil
A pinch of sea salt
A few cracks of black pepper
4 tbsp plain yogurt
1 tsp sumac

Oven to 190°C. Cut your pumpkin into 1 cm wedges, leave the skin on. Get them on a baking tray lined with greaseproof paper. In a separate bowl mix all of the crust ingredients together (except for the yogurt and sumac), you can use ordinary breadcrumbs of course, but I don’t have any of those. Besides, get yourself a bag of panko it’s way *way* nicer. You’ll wait to taste your mix before adding salt as the cheese will be salty.

Brush the pumpkin slices generously with the oil and coat them with the crust mixture, you’ll want a few millimetres of the deliciousness. Gently pat the mixture to bind it better.

Whack it in the oven for around 30 minutes. I’ve burnt mine a wee bit as I left them in a bit long. Oh well. Texture!

While that’s cooking mix up your yogurt dip with some salt, pepper, maybe a bit of olive oil or cream if it’s not the consistency that you want. Sprinkle with the sumac before serving. Get those wedges out of the oven when done and maybe squeeze some lemon juice over them. Super easy and fun to eat.

Golden Prawns – 黃金蝦 – Prawns stir fried with salted egg yolks

黃金蝦

I few posts ago I mentioned my Auntie Ann who is a great home cook, and I realised I had to learn how to make her lotus root fritters once I went back to visit the family in Hong Kong. So since I’m here at the moment, I asked her about a cooking lesson and she was so pleased I wanted to learn, that a date was quickly set. It was only a couple of days ago that I had the pleasure of not only making said lotus root delights but also this particularly scrummy prawn dish. For those uninitiated to the salted egg yolks stir fried with prawns, I can imagine that it’s actually a pretty bizarre taste sensation. It’s creamy, mushy, salty, deliciously prawny & and has a texture a bit like wet earth. This is from the preserved salted egg yolks and it’s the earthy sensation that actually makes them *good* so don’t be too alarmed next time you try this dish at a decent Chinese restaurant. I learned loads of new techniques and was even more impressed that my Aunt can churn out all this great food on just a two hob stove in a kitchen a third the size of my own mini proportions back in London.

To make this dish you want to buy some salted eggs from your local Chinese supermarket and you’ll need about 1 salted egg yolk per 2 big ass prawns. We had six prawns between the two of us. Oh, and I guess I should give a bit of a warning here: this dish is absolutely loaded with cholesterol. But that’s what makes it so utterly delicious.

Golden Prawns:
6 large prawns with their shells still on
3 salted eggs
1 1/2 tbsp of vegetable oil - not olive oil
2 tbsp corn flour
couple of pinches white pepper
1 tbsp butter

Depending on what type of salted eggs you buy (or you know, you can make your own), they are raw inside so you want to clean off the charcoal stuff before you cook with them. Crack your salted eggs into a plate and steam them for around 15 minutes until the egg yolks are just cooked. When they are done, remove the yolks from the egg whites and put them in a small bowl. Using a metal spoon, gently cut each yolk in half and remove and discard this hard pea sized nubbin from inside (removing this is actually optional, it’s just a harder piece of yolk, my mum says keep it in – meh – sisters will disagree). With the same metal spoon roughly chop the yolks – you want nice bits to chew on so nothing smaller than a centimetre cubed. Save for later on.

Wash and prep your prawns*. Use a pair of scissors and trim the legs off, cut off the sharp front part off the head – chop off about about half an inch- and trim a bit off the tail. At the bit of the prawn where the head meets body, make about a half an inch incision along the top of the the body and remove a bit of that section either side of the body. This helps keep the prawn intact as most of it’s shell is still holding it together, but also gives the yummy egg mixture a chance to get to flavour the fleshy bits of the prawn. Now use a small paring knife and tease the black vein out of the prawn. Rinse and pat dry the now cleaned and prepped prawns with a paper towel. Stir the corn flour with a couple of pinches of white pepper and dust dust dust each prawn and set them aside.

Wok on stove to high heat with a tablespoon of oil. When the oil is good and hot, stir fry your prawns until they are half cooked. Remove prawns and set aside on some kitchen roll.

Wipe down the wok. Heat to medium high. Add half a tablespoon of oil and one tablespoon of butter. When the butter is at heat, get your egg yolks in and gently toss, it should all foam up and smell really nice. Carefully toss in the prawns and take the heat up high to finish it all off. You really don’t need to cook these for long you just want to coat the prawns and cook them through. Serve!

prawn illustration*Doodle of prawn prep

Salsify: The Poor Man’s Oyster?

There was a very interesting addition in my veg box recently. Wrapped carefully in brown paper were what looked like four 10 inch branches of a tree covered in a layer of dried mud. “…” I thought, as I washed them clean and guessed at burdock. Only to discover (after ferreting out my receipt) that I’d actually received some salsify. I have never eaten salsify before although I vaguely remember reading some recipe recommending making chips out of them. How boring.

A quick search on the inter webs today informed me that the salsify root is also known as the ‘oyster plant’ as it tastes a bit like those delicious morsels of the sea. I absolutely adore oysters and after peeling a bit of root and tasting it raw and then quickly blanching and tasting another piece, I can report that these oyster allusions are pure: lies. What it does taste like however, is a cross between lotus root, water chestnuts and coconut flesh. Which instantly made me think of my Aunty Ann’s lotus root fritters and that I really must learn how to make next time I’m back in Hong Kong…anyway. Fritters. Salsify fritters. Let’s go:

Salsify Fritter Ingredients:
Approx. 300 g salsify cleaned of mud - pre peeled weight
2 tbsp unsalted butter
1 garlic clove - crushed
1 tbsp minced lemon grass
1 tbsp paprika
1/2 tsp chilli flakes (or one small red chilli - diced)
3 tbsp coriander - roughly chopped (save some to garnish)
1 egg - lightly beaten
1 tbsp flour
Sea salt & ground black pepper
2 tbsp olive oil

Peel and coarsely grate your salsify, once those roots become too fragile to peel, chop them up to match the grated bits. Add a tablespoon of butter into a frying pan at medium heat and sauté the salsify until tender. Transfer into a bowl and mix well with the garlic, lemongrass, chilli, paprika, coriander, egg and flour. Basically mix every except the butter and olive oil. Generously season with the salt and pepper.

Frying pan back on the stove at medium heat and put the remaining tablespoon of butter in with the olive oil. This helps your butter reach a higher heating point without it burning.

Get a tray, coat it with some flour. Dust your hands in that flour and quickly form a fritter with your dusty hands – once moulded rest it in the flour tray. Dust. Form. Dust. Form. You should make around 5-6 fritters.

When the oil and butter mixture is hot enough to sizzle. Fry the fritters until golden brown on each side. About 5 minutes each. When done, place them on a paper towel to drain them.

Serve up and garnish with some extra coriander leaves. I served these tasty fritters with poached egg, a slice of lime, and an easy salad of romaine lettuce, cucumber and tomatoes. The salad was dressed with an Asian dressing made up of sesame oil, rice vinegar, light soy and a mix of sesame seeds. I quickly made this to taste…but if I were to guess my proportions I’d say 1 tbsp of each liquid with 1 tsp of the seeds. Squeeze that lime over your fritters and consume!

Categories