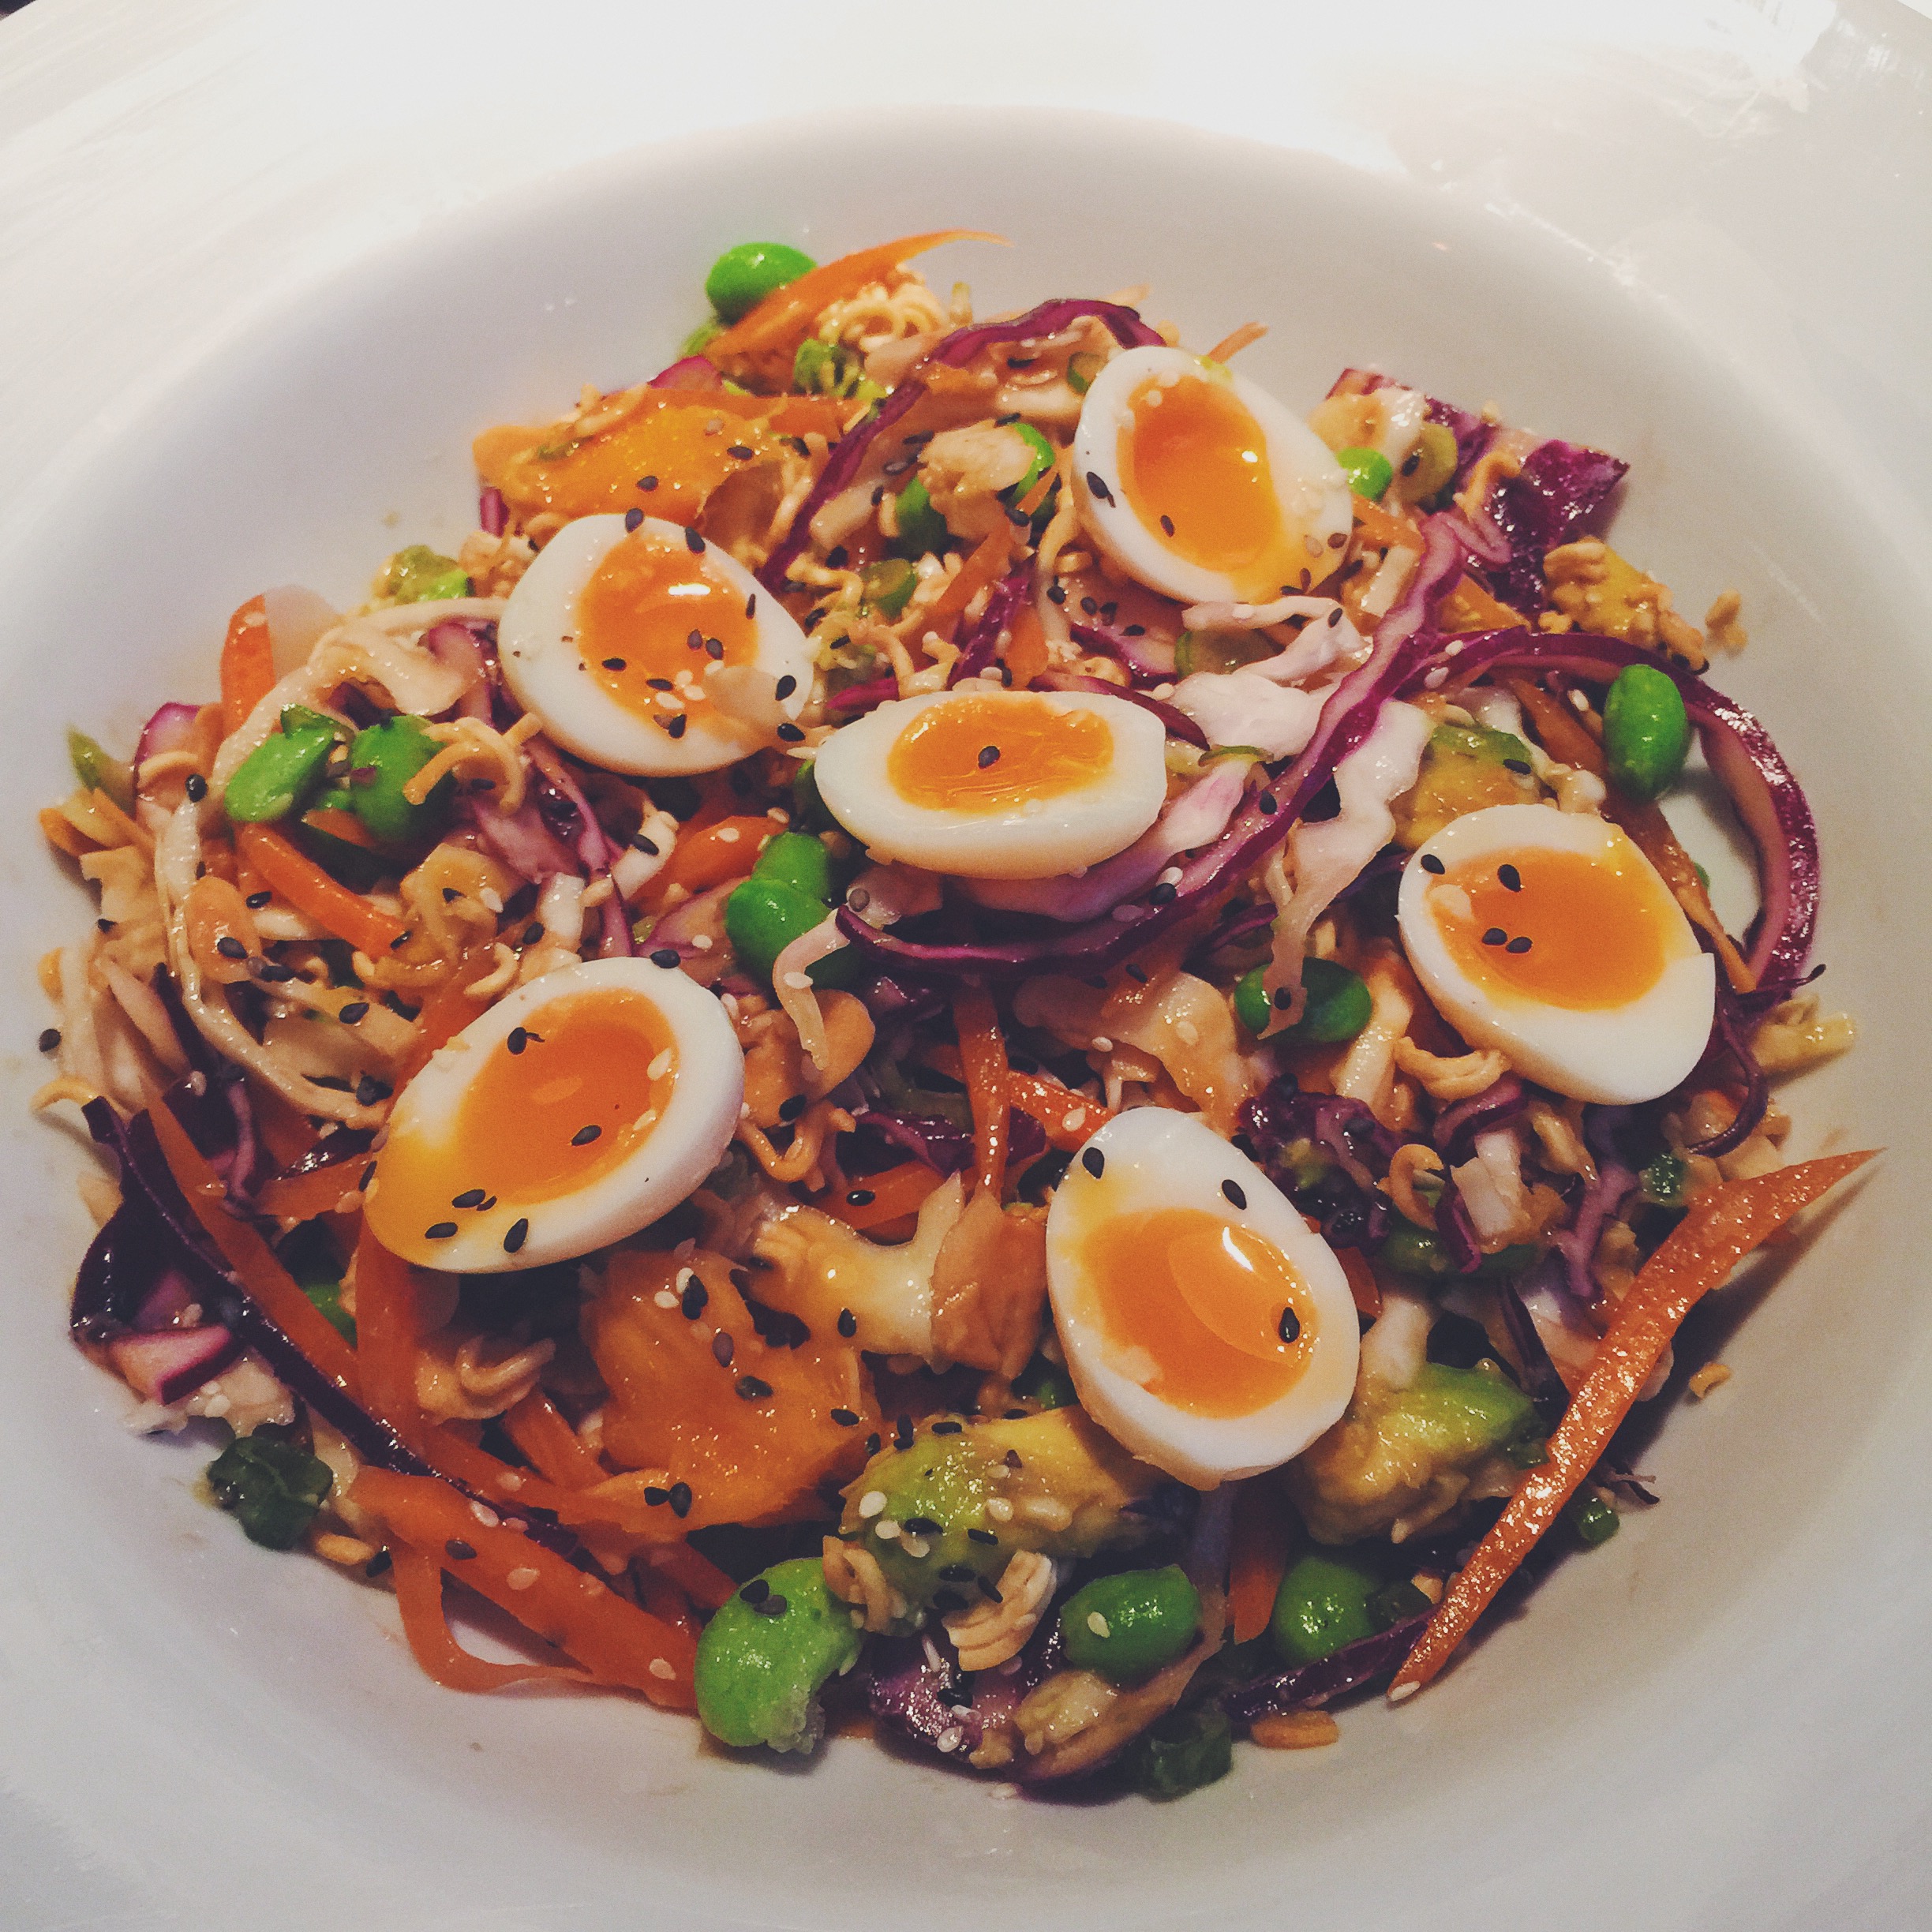
Or as I like to call it: “The Best Coleslaw I have Ever Made & Eaten”. It’s basically mouthfuls of flavours and textures that everybody likes. “Hawaiian style” means you have those tropical fresh flavours with a Japanese twist. Hapa food at its scrummiest, and it’s so pretty! It’s a winner of a salad. I promise you, fully paid up members of The Carnivore Club will gobble this salad down in delighted surprise at any sunny barbecue. The best and fanciest elements of this salad dressing are the Yuzu and Umeshu flavours, which are citrusy and floral in scent, lifting it from the claggy mayonnaise typicaly found in conventional slaws. You can buy these ingredients along with your pre-shelled edamame at most oriental supermarkets, but I would opt to pop into one specialising in Japanese products to be sure I get the Yuzu juice (or even fresh Yuzu if you can find them!).
Serves 4
Hawaiian Slaw:
1/4 red cabbage, finely sliced core removed
1/4 white cabbage (same as above)
1 carrot, julienned
1 cup pre-cooked shelled edamame
1 mango, cubed
1 avocado, cubed
1/2 a juice of lime
half a bunch spring onions, finely sliced
1 packet instant ramen noodles
1 handful sliced almonds
2 tbsp black sesame seeds
2 tbsp white sesame seeds
*optional* 8 quail eggs
Set your oven to 150°C. This salad is all about prep work and very little cooking! I would go ahead and mix up the salad dressing now or in advance so the flavours have time to meld together.
Yuzu Honey Salad Dressing:
110 ml vegetable oil (I used soybean oil)
2 tbsp honey or agave
30 ml rice vinegar, or sherry in a pinch
1 tbsp soy sauce
30 ml Umeshu (Asian plum) wine
30 ml Yuzu juice
1 tsp sesame oil
1 garlic clove, crushed
salt & pepper to taste
Got a mandolin handy? Get it out to make short work of slicing the cabbages finely and the carrots into match sticks. After cubing the mango and avocado, squeeze the lime over them to stop them turning brown.
If you want the optional quail eggs, pop them into boiling water for 2 minutes if you want them soft-boiled or 3-4 minutes for hard-boiled. When done pop them into cold water before you peel them to stop the cooking process. Then peel them and set them aside, when you’re ready to serve slice them in half and arrange on top.
With your ramen packet still closed, crush up the instant ramen into small nibbly pieces, then open up and discard the seasoning sachets enclosed (because MSG central!). Now scatter the noodles over a baking tray. Add to this the almond slices and toast them both together in the pre-heated oven, you want them toasted golden brown. Keep an eye on them and give them a shake occasionally to brown evenly, they should take around 10-15 mins. When done, remove them and set them aside to cool, then add the sesame seeds to the noodles and almonds.
Don’t dress the salad or add the dry crunchy ingredients until you’re ready to dish up. But you only need to mix everything up and serve!


Recent Comments