Salted Caramel Sauce

salted caramel sauce

Good grief. Do you know what I realised? Minikin Kitchen is 1 year old today! It’s been an interesting experiment into cooking and blogging. I just discovered a recipe of mine doing the rounds on Pinterest which is rather exciting. As I started this thing on Halloween and I’m prepping some treats for a Halloween party tomorrow, I thought I’d post something that I just knocked up. Be warned this stuff is way too ‘I’ll just dip my pinky into it’ addictive and anyone *anyone* who tells you they don’t like salted caramel is a bloody liar.

Salted Caramel:
1/2 cup caster sugar
1/2 cup light brown sugar
110g butter
1/2 cup double cream
1 tbsp sea salt flakes

On medium to high heat, get a heavy bottomed stove on and melt your sugar. With a metal spoon, only stir the sugar occasionally to help it all dissolve evenly. If you want to use a sugar thermometer, you want this to reach 175°C but I have to admit, I kinda eyeballed this. You want it a rich golden brown colour and basically don’t want it to burn. Once it reaches the desired temp, add the butter and double cream and stir well. Now add the salt and set this aside to cool.

The temperature of the sugar really dictates the viscosity of this sauce, you’ll notice I’ve made a bit on the fudgy side, but if you want a runnier constancy add more double cream. I basically add this to most things. I drizzle it over yogurt, ice cream, pancakes, filled macarons with it…I even put it in the freezer to firm up and rolled little salt caramel balls and stuffed them in homemade chocolate truffles (stroke of genius if I do say so myself).

Addictive and indulgent. A fitting birthday post.

Rhubarb Crumble with Ginger (and possibly Greengages) as well as Real Custard

Rhubarb & Ginger Crumble

Rhubarb! Yay! Let’s make a crumble. I also very recently learned that rhubarb is used in traditional Chinese medicine, so it feels like the ginger pairing is rather fortuitous now. But lets face it, I had ginger wine in the house and that stuff is like alcoholic nectar of which I only put the fresh ginger in to enhance the booze! So…I’m not sure how overall healthy or medicinal the following dish is, but it is very satisfying to eat, and I even had some for breakfast the following day with cold custard. Not. Even. Guilty.

It’s at this point that I should also mention that I *think* I added some greengage plums to this dish, which was a totally amazing addition as the fruit really held shape and added a lovely bite to the overall dish. But I cannot of yet totally confirm this so I’ll have to come back to this post and edit it later if I ever find out whatever the hell plum-like things I actually did add to this.

Rhubarb filling for crumble:
400 g rhubarb - prepped weight
100 g greengage plums (possibly) - stoned and quartered
3 tbsp ginger wine - generous servings
1 tbsp fresh grated ginger with it's juices
100 g soft light brown sugar

Chop your rhubarb into long 10 cm by 1 cm sticks. Get all the above into a pot and simmer it all at low heat for around 15 minutes. You don’t want your rhubarb too soft. Once that’s done, you’ll probably have a bit too much thin liquid for a nice compote sauce, so sieve the fruit out and rest it in your oven proof dish while you crank the heat up in the pot and boil those fruit and sugar juices into a lovely thicker consistency. Pour this over your fruit and get your oven to 200°C. Move onto the crumble topping.

Crumble topping:
140 g self raising flour
85 g butter - chilled, cut in cubes
50 g soft light brown sugar
50 g walnuts - roughly chopped

With all of these ingredients in a glass bowl, you’ll want to dive in with your fingers and bring it together like course breadcrumbs. Don’t over mix and be too neat and tidy, the rougher the better. In fact. Go with *just* combined with larger odder shapes scattered through. The chopped walnut bits will help with this. Sprinkle this over your fruit mixture and whack it in the oven until the toppings golden brown and the fruit mix is bubbling to the surface a bit. 15-20 minutes maybe?

While that’s going on, lets make some actual proper custard too. This is Mary Berry’s recipe, and honestly, why would I want to change it? It’s pretty perfect. The only thing I did at the end was crank up the heat slightly and whisked it in a glass bowl before serving because I thought it was starting to split. Balloon whisks – kitchen lifesavers.

Mary Berry's "Real Proper Custard":
568 ml whole milk
55 ml single cream
1 vanilla pod - split lengthways
4 egg yolks
40 caster sugar
3 tsp cornflour - level measurements

Get a small pot on the stove and heat you milk, cream and vanilla pod at low heat. You don’t want it to boil.

In a separate bowl, mix up your egg yolks, sugar and cornflour until well blended.

Remove the vanilla pod (then wash and leave it to dry, put it in some sugar: vanilla sugar! Yay for Mary), and slowly pour the milk mixture into the egg yolk mixture – whisking all the time. Once it’s all incorporated, pour your custard back into your pot and slowly stir with a wooden spoon until you reach your desired consistency. Pour it all in a jug ready to serve and sit it in a pot of hot water to keep warm. Maybe put some cling film on top to stop a skin forming. Serve it up with your desert (or breakfast for that matter).

Creme Caramel. Otherwise Known As: Caramel Flan V2

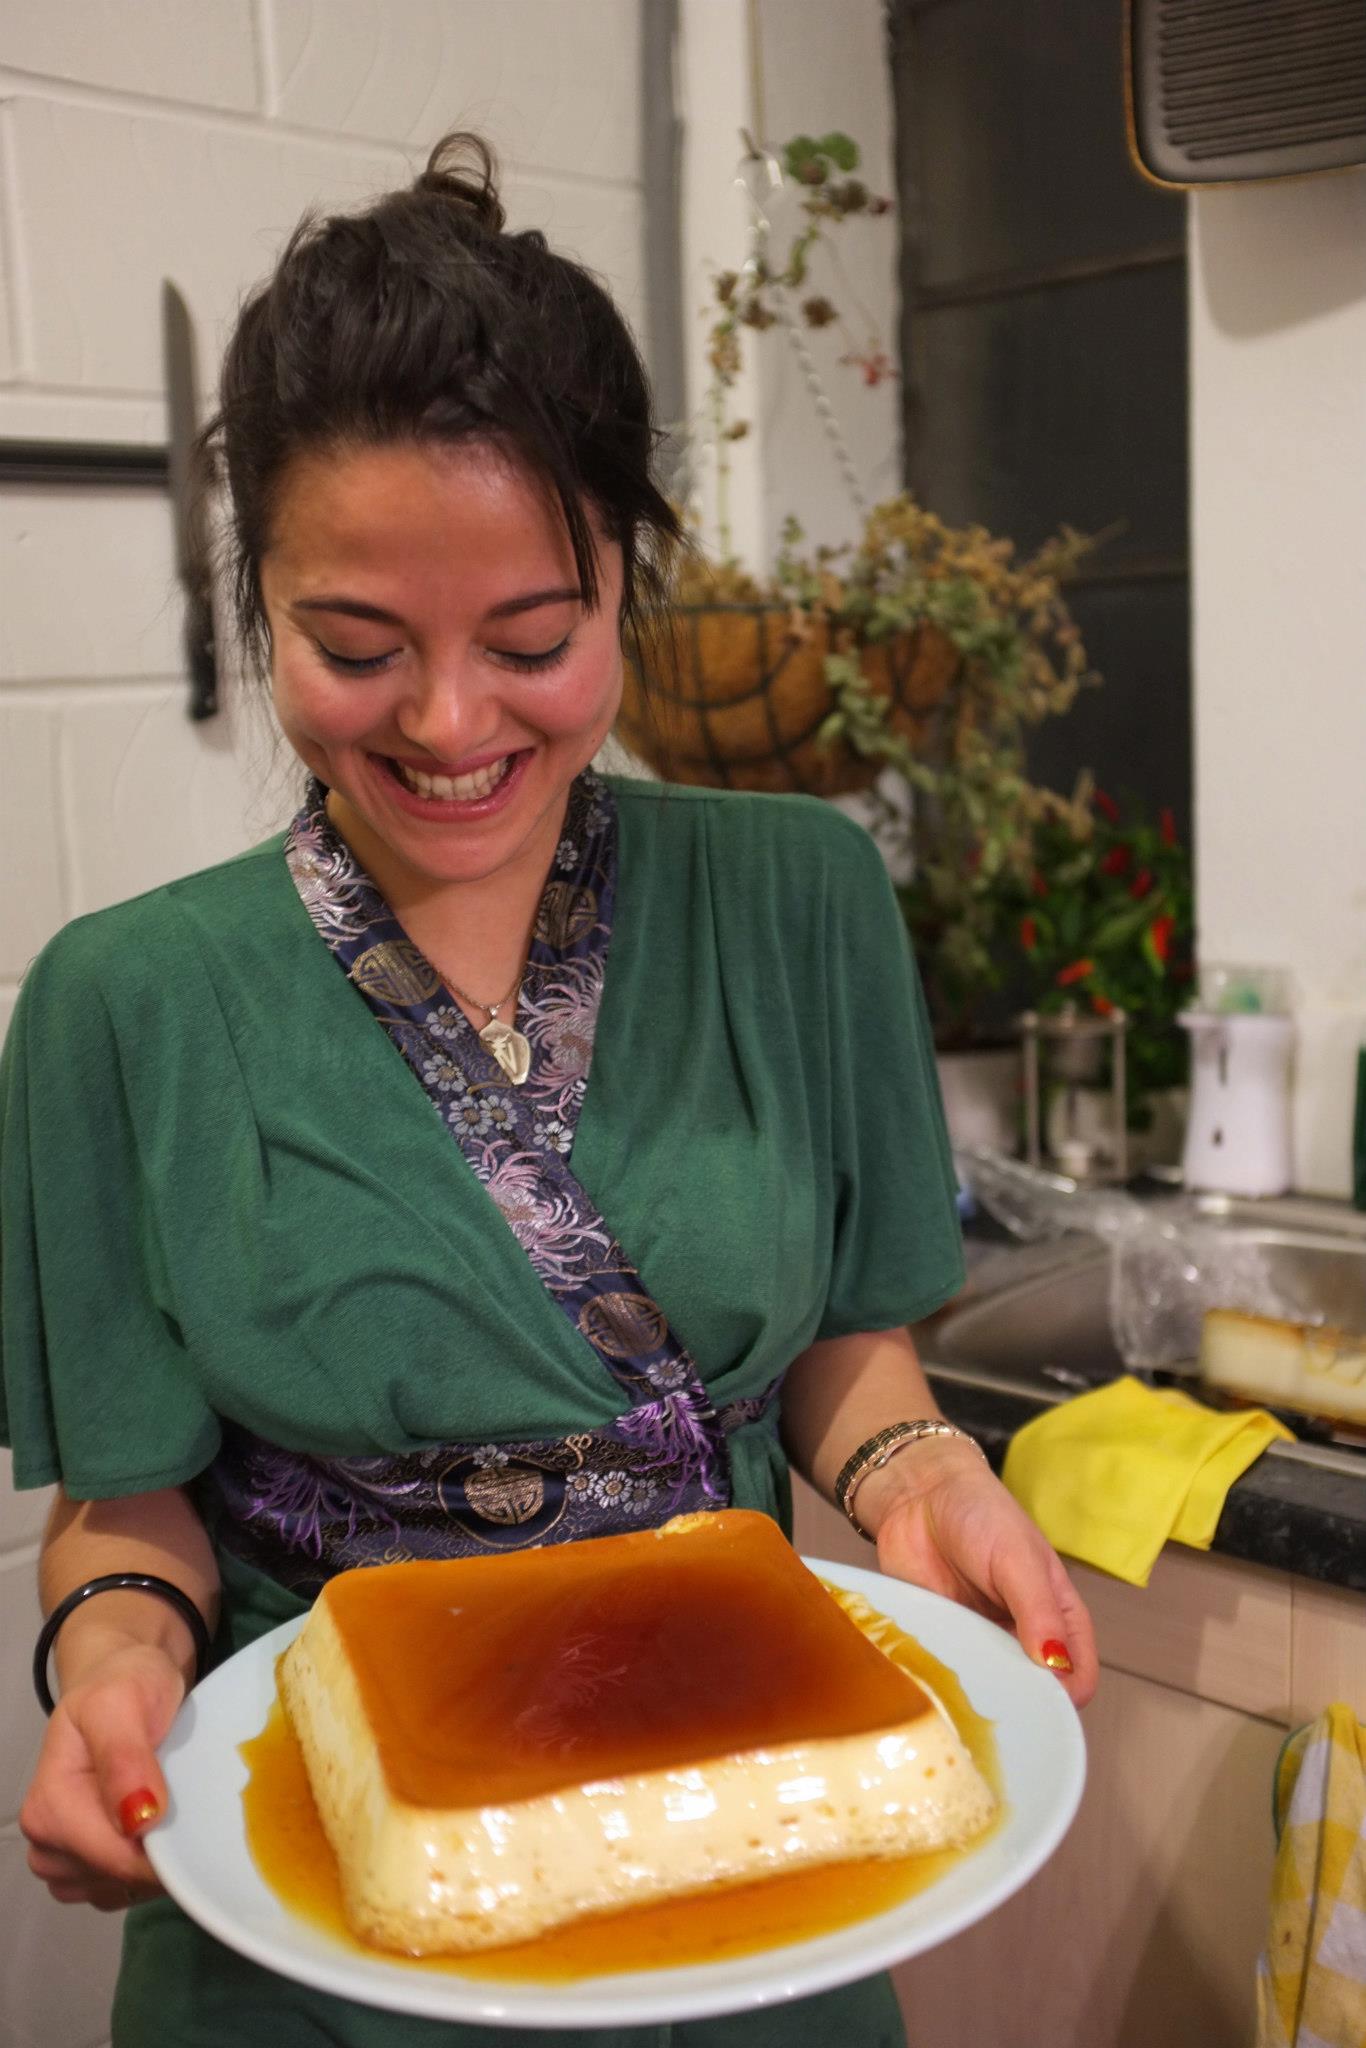
Creme CaramelSo a while ago as I was doing the New Year’s Detox I wrote about this mega easy caramel flan I made for my family over Christmas back in Hong Kong. It went down a treat, but for my Mother and myself it just wasn’t the soft delicious delight we were hoping for. Which made me try rather a lot of creme caramel recipes of late and I’ve been working on one that is not only soft and delicious, but doesn’t liquify upon turning out. It’s probably not *perfect* but it seems pretty fool-proof so far so I thought I’d share it. I made a massive one of these to finish off my Chinese New Year party (and probably my guests too), and I’ve also tried substituting the milk for not only rice milk, but soya as well, and I’m pleased to report that it works superbly.

Makes enough for 6-8 ramekins.

Caramel Flan V2:
115 g caster sugar
1 tbsp water
625 ml milk (or unsweetened dairy free substitute)
1 vanilla pod or 1 tbsp pure vanilla extract
100 g caster sugar
3 whole eggs
3 egg yolks

Oven at 170°C. Get a heavy bottomed non stick pan on to high heat. Into this add the 115 g of caster sugar and the tablespoon of water. Caramelise your sugar and be careful not to burn it, I like to just let it sit for ages taking in the heat while I work on other things. I’ll only start to stir with a metal spoon right at the end browning process.

While the caramel’s on the stove, put your ramekins in a deep enough tray to use as your water bath. But without any water in it for now, put it in the oven so your ramekins take on a good amount of heat. This is so when we spoon the caramel into them it doesn’t seize up.

Take your tray of hot ramekins out of the over when your caramel’s about done, then quickly and carefully spoon about a tablespoon of caramel into all the dishes. Move them about a bit to evenly coat. Set them aside.

In another pot, bring the milk and vanilla to just below boiling point. If you’re using a whole vanilla pod, don’t forget to slice along it length wise. When at heat remove from stove and set aside.

Get a large glass bowl and mix together all your eggs and the remaining sugar. To this use a fine mesh sieve and quickly whisk and incorporate the hot milk. When it’s all mixed together you may get a lot of foam on your custard mix. I like to place a kitchen towel on top to remove this.

Ladle some custard mix into each of the ramekins. Remove any extra bubbles with the kitchen towel as above. Place all the ramekins in the water bath tray and fill it with some boiled hot water so that it’s at least over the half way point of the ramekins. Now into the oven for 20-35 minutes.

The creme caramels should have some wobble in them still, but set. Some may have a solid skin atop of them. If you’re really fussy (I am) and the top membrane is thick enough, carefully remove this then let them cool and get them in the fridge ready to be served. The longer you leave them in the fridge the better I think because the caramel dissolves more. When you’re ready to serve, run a sharp knife all the way around and turn it out on a plate.

And that’s it! This also brings an end to all the dishes I made that snowy sunday evening to usher in the Year of the Snake. So I’ll be on to regular kitchen experiments from now on.CNY Flan

Caramel Flan V1

flan

Gah…so January’s been eventful already! I’ve been so good with eating healthily as per the rituals of The January Detox (I’m currently eating a bowl of steamed purple sprouting broccoli…no jokes) that I started to reminisce about this mega easy flan I made for a huge Christmas feast last December.

Now there’s a reason that this recipe is called version 1, because this produces quite a firm flan with more of a bite than a creme caramel’s soft unctuousness, but it’s yummy, velvety and uses whole eggs. Which is handy if you don’t really have the time to separate your yolks and have left over egg bits. PLUS it’s probably the only non-cooking recipe I’ll post here because it uses tins of evaporated milk and condensed milk. But once I crack the perfect soft flan that doesn’t liquify on turning out, version 2 will be out with a gusto. I can promise you that.

Mega Easy Flan:
1 cup caster or granulated sugar
1 tbsp water
3 eggs
1 (14 ounce) can condensed milk
1 (12 ounce) can of evaporated milk
1/2 cup of whole milk
1 tbsp vanilla essence

Get your oven to 170°C.

Put the sugar, and tablespoon of water in a heavy bottomed pan on stove on medium heat. Without shaking the pan, wait for the sugar to caramelise. Careful not to let it burn, you can use a metal spoon to stir it all together towards the end, but in general with making caramel just leave and watch it. While it’s getting on its way to all lovely and golden, take the dish you’ll cooking your flan in (I used a 10 inch pyrex dish) and place it in the oven for a bit just to warm it up. This just stops the caramel from seizing up in a cold dish.

So once the caramel’s done (try not to place the spoon covered in liquid hotter than the sun in your mouth) carefully pour it in your dish and swirl it all around set it aside and let it cool.

In a large bowl, pour in all the condensed milk and carefully stir in the eggs. ‘Stir’ being the operative word, you don’t want to vigorously whip it all up and create air bubbles. Once throughly mixed add the evaporated milk, whole milk and vanilla essence and combine it all together.

Decant your creamy mixture through a sieve into your caramel dish. Cover with foil. Now place this into a water bath in the oven. So that’s a larger deeper oven tray filled with water until it reaches halfway up the flan dish. Bake for 60 mins. Or until the centre is no longer liquid when you wobble it a bit.

Leave it to cool thoroughly and when you’re ready to serve, run a sharp knife round it, place a plate on top and flip that flan over. Feeds 6-8.

Panna Cotta with Blackberry Compote

panna cotta

Wow, a week has passed and I haven’t updated. My bad. It’s not that I wasn’t cooking, truth be told, I’m actually back in Hong Kong over the holidays and there’s a lot of cooking, eating and catch ups to be had. But this post isn’t about my blogging tardiness, it’s about this delectable panna cotta I made as the finishing touch to a meal I cooked for my friend. Deserts are always I bit of a hard one I find. I tend to always eat a bit of fruit normally, but after an indulgent meal sometimes you crave something a little more. This is a dainty light panna cotta with a sweet yet satisfyingly sharp compote to balance out those flavours. I’ve cheated a bit, in that the panna cotta isn’t set then turned out of a ramekin, but how pretty does this look? Plus, Polpo does it this way, so it can’t be all bad. This makes 3-4 little tumblers worth of pudding.

Panna Cotta with Blackberry Compote:
190 ml full fat milk
200 ml double cream
40 g caster sugar
1 vanilla pod
4 g leaf gelatin
1 tbsp of grappa or grape juice
About 125 g of blackberries with extra to serve

Put a heavy based pan onto the stove. Into this, add your milk, double cream,  35 g of caster sugar and the seeds scraped out of your vanilla pod. Just before it all comes to boiling point, remove it from the heat.

Get some icy water into a container and soften your gelatine leaves for about 5 minutes. Squeeze out the water (playing with gelatine at this stage is quite tactile and fun!) and add this to your creamy mixture along with your grappa.

Pour your creamy liquid into a glass bowl over some ice and let it slowly cool. Give it a stir every so often to disperse the vanilla pod seeds. Once the seeds start to suspend themselves in the creaminess, about an hour later, your mixture is ready. Decant into some tumblers and chill them in the fridge. They are even better if left overnight, but I was happy with 8 hours of chilling.

Now make your compote. Put your 125 g worth of blackberries into a large saucepan with around 25 ml of water and the remaining caster sugar. On a very low heat, poach those berries until they soften and start to lose their shape. At this point you want to access how you like your compote. I mashed half of the softened berries and added a tiny bit more sugar and water. I would recommend that you don’t make it too sweet though, because you want something to counter the sweet creaminess of the panna cotta. But you know. Do it to taste.

When you are ready to serve, add a generous helping of compote to your little panna cotta tumblers and add a couple of fresh blackberries for some variation. Yum yum yum. Oh! It’s new year’s eve today as well so I hope you all have a blast partying around the world tonight. Bring on 2013!

Thanksgiving Potluck: Pumpkin Pie

Last year, a friend of mine decided to host a Thanksgiving dinner. But as the task was a bit vast a pot luck dinner was agreed where each guest would focus on one element of the meal. It was a great success. This year Thanksgiving Potluck was had again, and it’s looking like a pretty nice tradition being established. Good food, good friends, and a moment to be thankful for the past year.

Last Thanksgiving I made a pumpkin pie. It was latticed, yummy but too massive for a comfortable after dinner treat. So this year, I used a different recipe and tried to focus on dainty.

The first thing you want to do is make the pie crust:

Basic Pie Crust:
260 g plain flour
1/2 tsp salt
110 g unsalted butter
a 23 cm pie dish - greased
baking beans

Flour, salt and butter in an electric mixer with a paddle attachment. Beat at a low speed until they’re all combined and  you get a sandy consistency. Add a tablespoon of water and start to increase the mixing speed. When well mixed, add another tablespoon of water. You want to get a smooth even dough, but you don’t want to add too much water. It’s better to be patient and wait while that paddle it going round super quick to bring that dough together. Wrap in cling film. Rest in the fridge for at least an hour.

Oven to 170°C.

Lightly flour a work surface and roll that dough out and line your pie dish. Put some greaseproof paper on and fill with those baking beans. Partially blind bake this for 10 minutes. It should be a bit raw still. Keep that oven at 170°C and make that pie filling.

Pumpkin Pie:
1 egg
425 g tinned pumpkin puree
235 ml evaporated milk
220 g caster sugar
1/4 tsp ground cloves
1 tsp salt
3/4 tsp ground cinnamon
1/4 tsp ground ginger
1 tbsp plain flour

In a large enough bowl, thoroughly mix up all these ingredients and pour them through a sieve into you’re slightly raw pie crust. I know, I know. I’m using tinned pumpkin puree…oooh…contentious. But you know what? I actually think it tastes nicer than prepping all that pumpkin myself. I usually like doing everything from scratch, but you get less of that green/fresh vegetable taste and I’m not keen on that in my desserts. Bake for  30-40 minutes, or until the filling has set and has lost that wobble when you shake it. Serve it with some ice cream or cream. Hope you all had a happy Thanksgiving.

Xavi’s Cookie Monster Cake

My fellow Eurasian friend Xavier is leaving the UK to try out Hong Kong for a bit. As I grew up in Hong Kong and chose to come over to Blighty, it’s the inverse move I made – so all in all: Exciting times for Xavi. When I offered to make a cake for his leaving do held at one of my fav Vietnamese places on Kingsland Road,  Song Que, I got this response:

“I don’t care what flavour cake you make… …So long as it looks like Cookie Monster”

Interesting brief.

I’ve never made a novelty cake before. I knew I’d have to make an awful lot of icing to make that furry looking decoration. I was initially contemplating colouring desiccated coconut blue and slathering it on a pre-iced blue cake. But the thought of how much desiccated coconut I would need or how I would even get the two blue elements the same shade was driving me a bit potty so I opted for the icing technique – because no one needs a blue cakey melt down. I didn’t want to send all the guests into an instantaneous diabetic coma so I went for a more neutrally flavoured cake of banana, pineapple with walnuts and cashews. The following will make a 3 layered sponge cake with 20cm cake tins and a shed load of frosting.

Ingredients for Cookie Monster Cake:
300 g caster sugar
3 eggs
300 ml sunflower oil
270 g banana peeled, roughly chopped
1 tsp cinnamon
300 g plain flour
1 tsp bicarbonate of soda
1/2 tsp teaspoon vanilla extract
100 g tinned pineapple, chopped into small pieces
100 g walnuts and cashews - I went with a 70:30 split

Oven to 170°C. Roughly chop the nuts and pineapple, set aside. With your electric or stand mixer: incorporate the sugar, eggs, oil, banana, vanilla and cinnamon at medium speed.

In a separate bowl, mix the flour and bi-carb. Add this to your wet mixture bit by bit until even. Finally stir in the pineapple and nuts with a wooden spoon.

Smear your cake tins with butter and line the bottom with parchment. Evenly pour in your mixture between the three tins and bake for 20-30 minutes. Mine took a bit longer so check with a skewer when they are looking golden brown on the top. Once the skewer comes out clean, take them out and leave them to cool in their pans while you sort out the icing.

Icing & Decoration:
900 g icing sugar
375 g cream cheese
150 g unsalted butter
1 bottle of blue food colouring
Black food colouring
A couple of chocolate chip cookies

You’re meant to mix the butter and icing sugar first before you add the cream cheese, then mix it all at medium to high speed for 5 minutes. I just whacked all three into my stand mixer and it turned out okay. But I really must recommend you roughly make a teepee with a tea towel because icing sugar really goes everywhere, especially at these huge quantities.

Before you add your food colouring prepare your cake. Slice the rounded top off your base layer (keep these tops for later). Blob a bit of icing onto your plate or whatever you’ll be serving the cake on. Stick base layer on said blob. Get your palette knife and spread some of your plain cream cheese frosting on top of your base layer. Cut the dome off your middle layer. Place on your base layer. Frost top. Place your final cake layer on top, I didn’t slice the top off this as I thought the rounded dome helped with the face shape.

Remove 2-3 tablespoons of the frosting and mix in some black colouring for the mouth. Using a mixer again, you can now add the blue colouring to the rest of your frosting to make your desired blue colour.

Googly Eyes:
Some of your cut off cake tops
Tennis ball sized amount of natural marzipan
2 large chocolate buttons
2 tsp Black food colouring

Make those eyes! With the cut off sponge tops, use a small cup or egg cup to trace around and cut a couple of circular pieces of sponge with a knife. Roll out your marzipan to 5mm, cut two large circles out and wrap each round a sponge disk. Coat the tops of  your chocolate buttons with black food colouring. Let these dry before fixing them on to the marzipan with a bit of frosting (I didn’t let them dry enough as I was running a bit late – error).

Use a palette knife and spread a thin but even coat of blue frosting around your whole cake. Affix those big marzipan eyes onto the top of the cake. Pipe out your black mouth shape. Fit a clean piping bag with a star nozzle, fill it with the blue icing. Pipe. Pipe. Pipe. Furry muppet monster! Shove the cookies into his mouth. You’re ready to go.

By the time it came to eat and cut the cake, Cookie Monster’s eyes were melting…causing him to cry black deathly tears as I ruthless carved into his face with a novelty cake knife that serenaded out tinny versions of Happy Birthday and the Wedding March. Outstanding.

Bon Voyage, Xavi. I hope you fall in love with Hong Kong, 一路順風!

Macarons: Basic Recipe (French Meringue)

Right. Macarons. I make these a lot. I make them for my own birthdays, for my friends birthdays, for my friends weddings and by request from my mum to take back to Hong Kong. I have experimented with these an awful lot.

In my constant search for attaining that Macaron Nirvana I have: tried various French meringue recipes; Italian meringue recipes; used fresh eggs; used rested eggs; added egg stabilisers; bought an oven thermometer; broken my oven thermometer; bought a newer more accurate oven thermometer; warped my oven trays; bought new oven trays; single & double stacked my oven trays; used parchment paper; used steam to remove my macaroons stuck to parchment paper; bought silicon baking mats; blitzed my ground almonds; double sifted my ingredients; triple sifted my ingredients; mixed fast; mixed carefully; mixed methodically; piped sloppily; piped pedantically; laminated my own piping template; used a toothpick to pop air bubbles; rested my mixture for 30 minutes; rested my mixture for 60 minutes; baked them quickly in a hot oven; baked them slowly in a cooler over; curdled my buttercream; burnt the cream for my ganache; used way too much rosewater in mascarpone…and created a few delectable morsels amongst a sea of calamitous attempts.

And still, I would only consider myself a novice at macarons, as I can still be found crumpled in a quivering mess on my kitchen floor because the Macaron Gods have conspired against me. I have tweaked and amended many recipes until I reached one that was almost 80% consistent depending on the weather and ridiculously long rest time of an hour. And after some particularly stressful days at work I decided that even I should go to a macaron class at On Patisserie and see what I was doing wrong. Because cooking makes me happy. Don’t judge. I’m a de-stressing stress cooker.

I was 20 minutes late. But as I was the only one in the class who had actually made successful macaroons at home, I still managed to bombard the wonderfully charming Loretta Liu with a torrent of really specific questions (“when you’re ageing your eggs in the fridge, do you have a preference for fresh or pasteurised egg whites? How many extra grams are you factoring in for weight loss?”). After her class, and scrutinising my really hilarious note taking. I’ve tried her recipe again and it does work pretty consistently! Also, it’s actually a lot simpler than the one I’ve been faffing around with so before you start, it’s probably best that you know that you need to age your eggs whites in the fridge for 3 days (I was doing 5! Already, 2 days off my timeline), so get those egg whites in a bowl, cover with cling film and make sure you have the following kit:

Equipment you need to make French macarons:
A handmixer or stand mixer
A large plastic bowl - No to: glass, metal & ceramic
A fine mesh sieve
A spatular
Gel food colouring - not liquid colouring
2 good quality, heavy, baking trays (to double stack)
Silpat or silicon baking mat equivalent
A good quality piping bag with a 10 mm nozzle
A template for your piping - circles at approx. 4.5 cm

Aged those egg whites? Got all of your equipment? Now here are the ingredients for basic macaron shells:

French macaron ingredients:
140 g Egg whites - Rested in the fridge for 3 days
95 g Caster sugar
170 g Ground almonds
260 g Icing sugar
Gel food colouring - approx. 1/4 tsp

Egg whites out of the fridge and get them to room temperature. Sieve your almond flour into a large plastic bowl (double sift them if you want). Now sieve your icing sugar on top. Do not touch this mixture. You want to avoid the icing sugar getting too touchy feely with the almond flour (it’s an oily nut so might cause lumps pre mixing). Set aside.

Whisk those egg whites with a hand or stand mixer to glossy firm peaks. Add caster sugar gradually.

Gently fold the meringue into the dry ingredients using quick circular motions. This mixture is known as ‘macaronage’. If you want to add the food colouring, I’d do it now. I like to add half the meringue first, mixing relatively briskly, then gently folding the rest in. The trick (and man, is this a bugger of a trick) is getting the macaronage smooth, even and *just* the right consistency so you don’t knock all the air out and it holds a nice shape after you pipe it out. You hear the term ‘ribbony’ banded about a lot for this stage. I don’t know what on earth that really means. But you want it looking a bit like this:

See how you can still see some definition to those peaks? It is always better to err on the side of under mixing than over mixing. You cannot salvage over mixed macaronage. The mixture should hold in the piping bag while you pipe, and not dribble all over the place. (Been there, done that…boring and supremely annoying).

Prep your tray, place your template underneath your baking mat. Now for the piping. Forget all those swirly creative cupcake icing techniques you may have perfected. Macarons need a steady calm hand for uniformity. Get your 10 mm nozzle in your piping bag. Twist the bottom (or use a laundry peg) so when you fill the bag, mixture doesn’t come out the other end. Thumb and forefinger at the top, gently squeeze so your mixture is just about to come out of the nozzle. Holding your bag perpendicular to the tray, hold it at 5mm (the height of your macaron shell) and slowly add pressure and fill until you make a perfect circle. Stop adding pressure. Lift straight up! Move on to the next one. Pipe. Pipe. Pipe. Pipe. Done!

You have a couple of choices in term of removing those nippily peaks a top of your piped batter . Bang the tray on the counter to gently flatten them out (easy, but temperamental) or learn to pipe them flat (a bit more advanced and takes a bit of time. It involves piping as above them adding a semi circle flourish to cut the peak off with the nozzle)…check this dude’s mad pipping skills. Envious much? You should have enough mixture to pipe at least two sheets. Pipe it all and rest them for 20-40 mins until they form a skin and bake one tray at a time. If you can, I would advise double staking those baking trays. This simulates insulated trays, and means the base of your macarons don’t cook too quickly and help you form those much needed ‘feet’ on the base of your shells.

While resting your batter. Set your oven to 160°C. Remove that template. Bake for 10 minutes.

This is pretty important. Not all ovens are the same, and the above temperature and timing is not a golden rule, you have to learn to be at one with your oven for this stage. Mastering one’s oven is the hardest or at least most frustrating part in this whole process. The final hurdle to conquer after all that time. Once done leave them to cool before carefully removing ’em from the baking mat. You’re now ready to fill them with a plethora of delicious fillings once they are fully cooled down. Pair up your shells according to shape similarity. Line one side facing up the other facing down. Pipe your fillings onto the ones facing up. Sandwich them and keep ’em in the fridge for 12-24 hours before you serve them up! Left over shells can be stored in the freezer.

For those of you crazy enough to embark on this macaron madness expect troubled waters. This is a pretty good guide in terms of trouble shooting. Good luck and godspeed.


Gingerdead Men

Happy Hallows Eve! This is officially my first post on my food blog. Exciting. But bear with me, I’m sure I’ll get better at this as I go along. For the past year or so I’ve been asked by numerous friends that I should probably start a food blog as I’m rather meanly posting pictures of what I cook in a Facebook album, but never really follow it up with techniques or methods. So here we go. Let’s start with this picture…

Last Christmas, back in my wonderful hometown of Hong Kong, Santa bought me this: a Gingerdead Man cookie cutter. It’s cuts the shape of the regular ginger bread person, but also has a skeletal extrusion for you to emboss the skeleton into the dough and thus bake and fill with royal icing. For those of you who know me well, this is a fantastic gift! It’s a little bit bakey and a little bit gothy…*fist pump!*

This Halloween I dressed as a Japanese School Girl Mauled by Zombies. It went down a treat. As did my trays of Ginger Dead Men. I based this on the Humming Bird Bakery recipe for these, I’ve only added more spice. This is a book that I absolutely recommend for any baker, I’ve followed and modified a lot of recipes in my kitchen experiments and this book always produces light balanced bakes. There are a lot of different ginger bread recipes out there, this particular one is of the more airy and slightly chewy German variety compared to the crumbly cookie commercial versions you can buy. It’s also lovely and spiced. Go forth and bake! Makes approx. 24 cookies, depending on your cookie cutter.

Gingerbread Dough
400 g plain flour
3/4 tsp bicarbonate of soda
2 tsp ground ginger
2 tsp ground cinnamon
1/2 tsp ground allspice
1/4 tsp ground nutmeg (I went with 1/2 tsp grated)
1/2 tsp salt
180 g room temp butter, cubed
125 g soft dark sugar - muscovado good
1 egg
125 g black treacle

Whack your butter and sugar in a mixer or bowl. Mix until light and creamy. In a separate bowl, mix all your dry ingredients ingredients (spices, salt, flour, raising agent). Increase mixing speed of butter and sugar then beat in the egg and treacle – use your spatular and scrape the sides and mix thoroughly. On a low mixing speed now, add in your flour mixture one tablespoon at a time until and scrape the side with that spatular. Mix – scrape – mix – scrape. Finished dough! Divide into 3, wrap in cling film and bung it in the fridge. The book says it’ll taste better if you store overnight. I didn’t do this, but I let it rest for 4 hours…that’ll do…

When ready to roll, heat the oven to 170°C get a dough out and rest ’em for 10 minutes. Meanwhile, prepare baking trays. Flour rolling pin and roll on a floured sheet of parchment paper, I find this easier to transfer my cut cookie shapes onto the prepared baking trays. Roll the dough out to 4mm. I placed a chopstick either side of my rolling pin so I was rolling the dough all nice and uniformed…clever hey? Stamp those shapes out! Bake for 10-15 mins. Cool slightly on the trays before transfering onto cooling rack.

Ready to do the icing? This was the only part of the recipe I didn’t follow as I was running a bit late and didn’t want to make it too stiff from the egg white as I wanted the icing to flow into the skeleton crevice. I simply eyeballed the icing sugar, lemon and water to the right dribbly consistency. But here are the actual quantities should you want them.

Royal Icing
1 egg white
1/2 tsp freshly squeezed lemon juice
310 g icing sugar, sifted
food colouring, optional

Beat that egg white with the lemon juice, gradually add the icing sugar. Mix well and you should get stiff peaks. If it’s too runny add more sugar. Add colouring if you want. Get it in your piping bag. Decorate and make pretty.

There you go. First post under the belt. Happy Halloween!

Categories