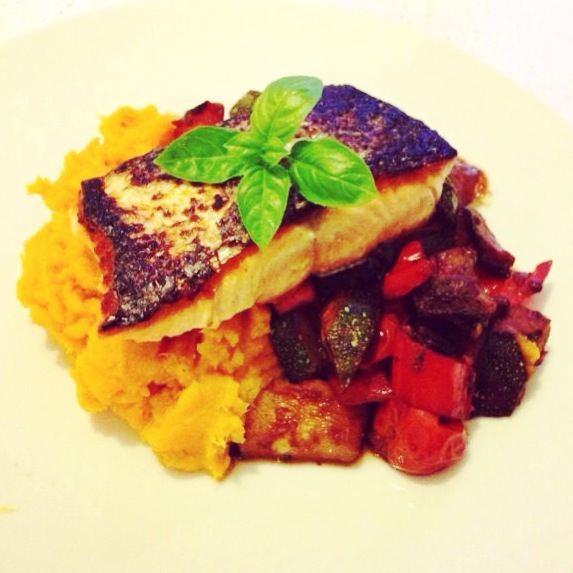
Salmon with Ratatouille and Sweet Potato Mash

salmon fillet with ratatouille and sweet potato mashOh man. Bookkeeping. Running your own freelance business does have it’s down sides. But amazingly after travelling along a floor of invoices and receipts and living in what clearly appeared to be a really specific Level Of Hell (floor 14 perhaps) I’ve discovered that for the past six months my books totally balance out and everything is pretty healthy looking in the expenses department. Huh. Mazing.

I’m a very particular type of stress cooker, and this was making a lot of appearances for the last couple of nights at around midnight and it’s pretty tasty so I thought I’d share. It’s for one, but you can easily double this.

Salmon with Ratatouille and Sweet Potato Mash:
1 salmon fillet
1 sweet potato - peeled and chopped
round courgette - sliced irregularly
1 red sweet pointed pepper
handful of cherry tomatoes - halved
glug of red wine
2 tbsp olive oil
splash of milk - I went rice milk
1 bay  leaf
1 garlic clove - crushed
1 small chilli - deseeded and finely sliced
1 tbsp tomato purée
pinch of oregano
pinch of rosemary
pinch of paprika
sea salt flakes
crushed black pepper

You’ll want to make you ratatouille first. I’ve suggested that you cut your courgette ‘irregularly’ because I have a weird aversion to perfectly square bits of courgette and I think the odd angles you cut in produce a nicer bite. So that’s your courgette. Slice your pepper however the hell you like.

1 tablespoon of olive oil in a pot on medium heat, to this add your crushed garlic, sliced chilli, bay leaf, oregano, rosemary and paprika. Then when all the spices start smelling lovely add your courgette, tomato and pepper. The eagle-eyed of you will notice there are no onions or aubergines in this dish. You can of course add these if you want, I simply didn’t have any at home. Add your glug of wine. Cover and stew while you deal with the mash. Keep an eye on this, you don’t want it to burn. Maybe add water or stock if it’s drying out too much.

To a pot of slightly salted boiling water, add the sweet potato and let that get nice soft. When it’s soft enough to mash with a fork (or mash-up with the mash attachment on your hand blender…what an awesome buy) drain and mash away. Season with some salt and pepper, and add a splash of milk or butter maybe. Keep warm and set aside.

Now cook your salmon fillet. Frying pan on the stove, high heat, tablespoon of olive oil in and wait for the oil to get really nice and hot before you put your fillet in skin side down. Fry for 2-3 mins, then cook the sides for about a minute each. Finally turn it over and cook the base of the fillet for a minute, switch your fire off and season the fish with a bit of sea salt and crushed black pepper. Prep your plate and dish up. That time it took for you to dress your plate should mean your fish is just cooked.

Scallops with Celeriac Purée & Lardons

scallops and celeriac purée

When the weather was cooler and I had a rather large celeriac root arrive in my veg box I decided to invite a friend over to cook up something nice with the celeriac and watch Black  Swan. Incidentally I recommend them both: The movie and the following dish.

Serves 2.

Scallops with Celeriac Purée & Lardons:
1 medium sized celeriac bulb
1 cup milk
Splash of single cream
50 g butter
100 g oak smoked lardons
12 scallops
Pinch of sea salt
Pinch of white pepper
Pinch of paprika
Some fresh basil to garnish

You’ll notice that I haven’t removed the orange part (or the coral) of the scallop. Puritans may suggest you do but I think they taste pretty good so at least try some before you discard it.

Peel and chop your celeriac bulb into small pieces. Get a medium saucepan on the stove at medium heat. To this add your chopped celeriac and cover with just enough milk. Bring it to a boil until it all softens up (around 10 minutes). When it’s nice and soft, season with salt and pepper and blend it all up with a hand blender. Add half the butter and the cream and simmer it down on low heat with a lid on until it reaches your desired thickness – or conversely, add more liquid until it reaches your desired thickness. Constantly taste and adjust your seasonings. Keep it warm and set it aside.

While that’s happening, cook up and render down your lardons in a small frying pan on medium high heat until nice and crispy. Add a pinch of paprika and maybe some cracked black pepper. When they are nice and crisp, keep a tablespoon or two of their fat for the scallops then set them aside in a slightly warm oven to keep warm. You’ll want to warm some serving plates too, so get those in there.

In a large non stick pan, get it up to medium to high heat. Add the reserved lardon fat and the rest of the butter. When the the fat starts to brown, add your scallops in a clockwise orderly fashion so you know which ones are taking in the most heat. Sear these for 30 seconds to 1 minute on one side and flip ’em over for 20 seconds or so. You may need to do you scallops in batches depending on how big your frying pan is.

Get your pre-warmed plates out and serve up. Purée in the centre of the plate, scallops on top. Sprinkle liberally with the lardons and their fat. Maybe a sprinkle of sea salt flakes. Basil to garnish.

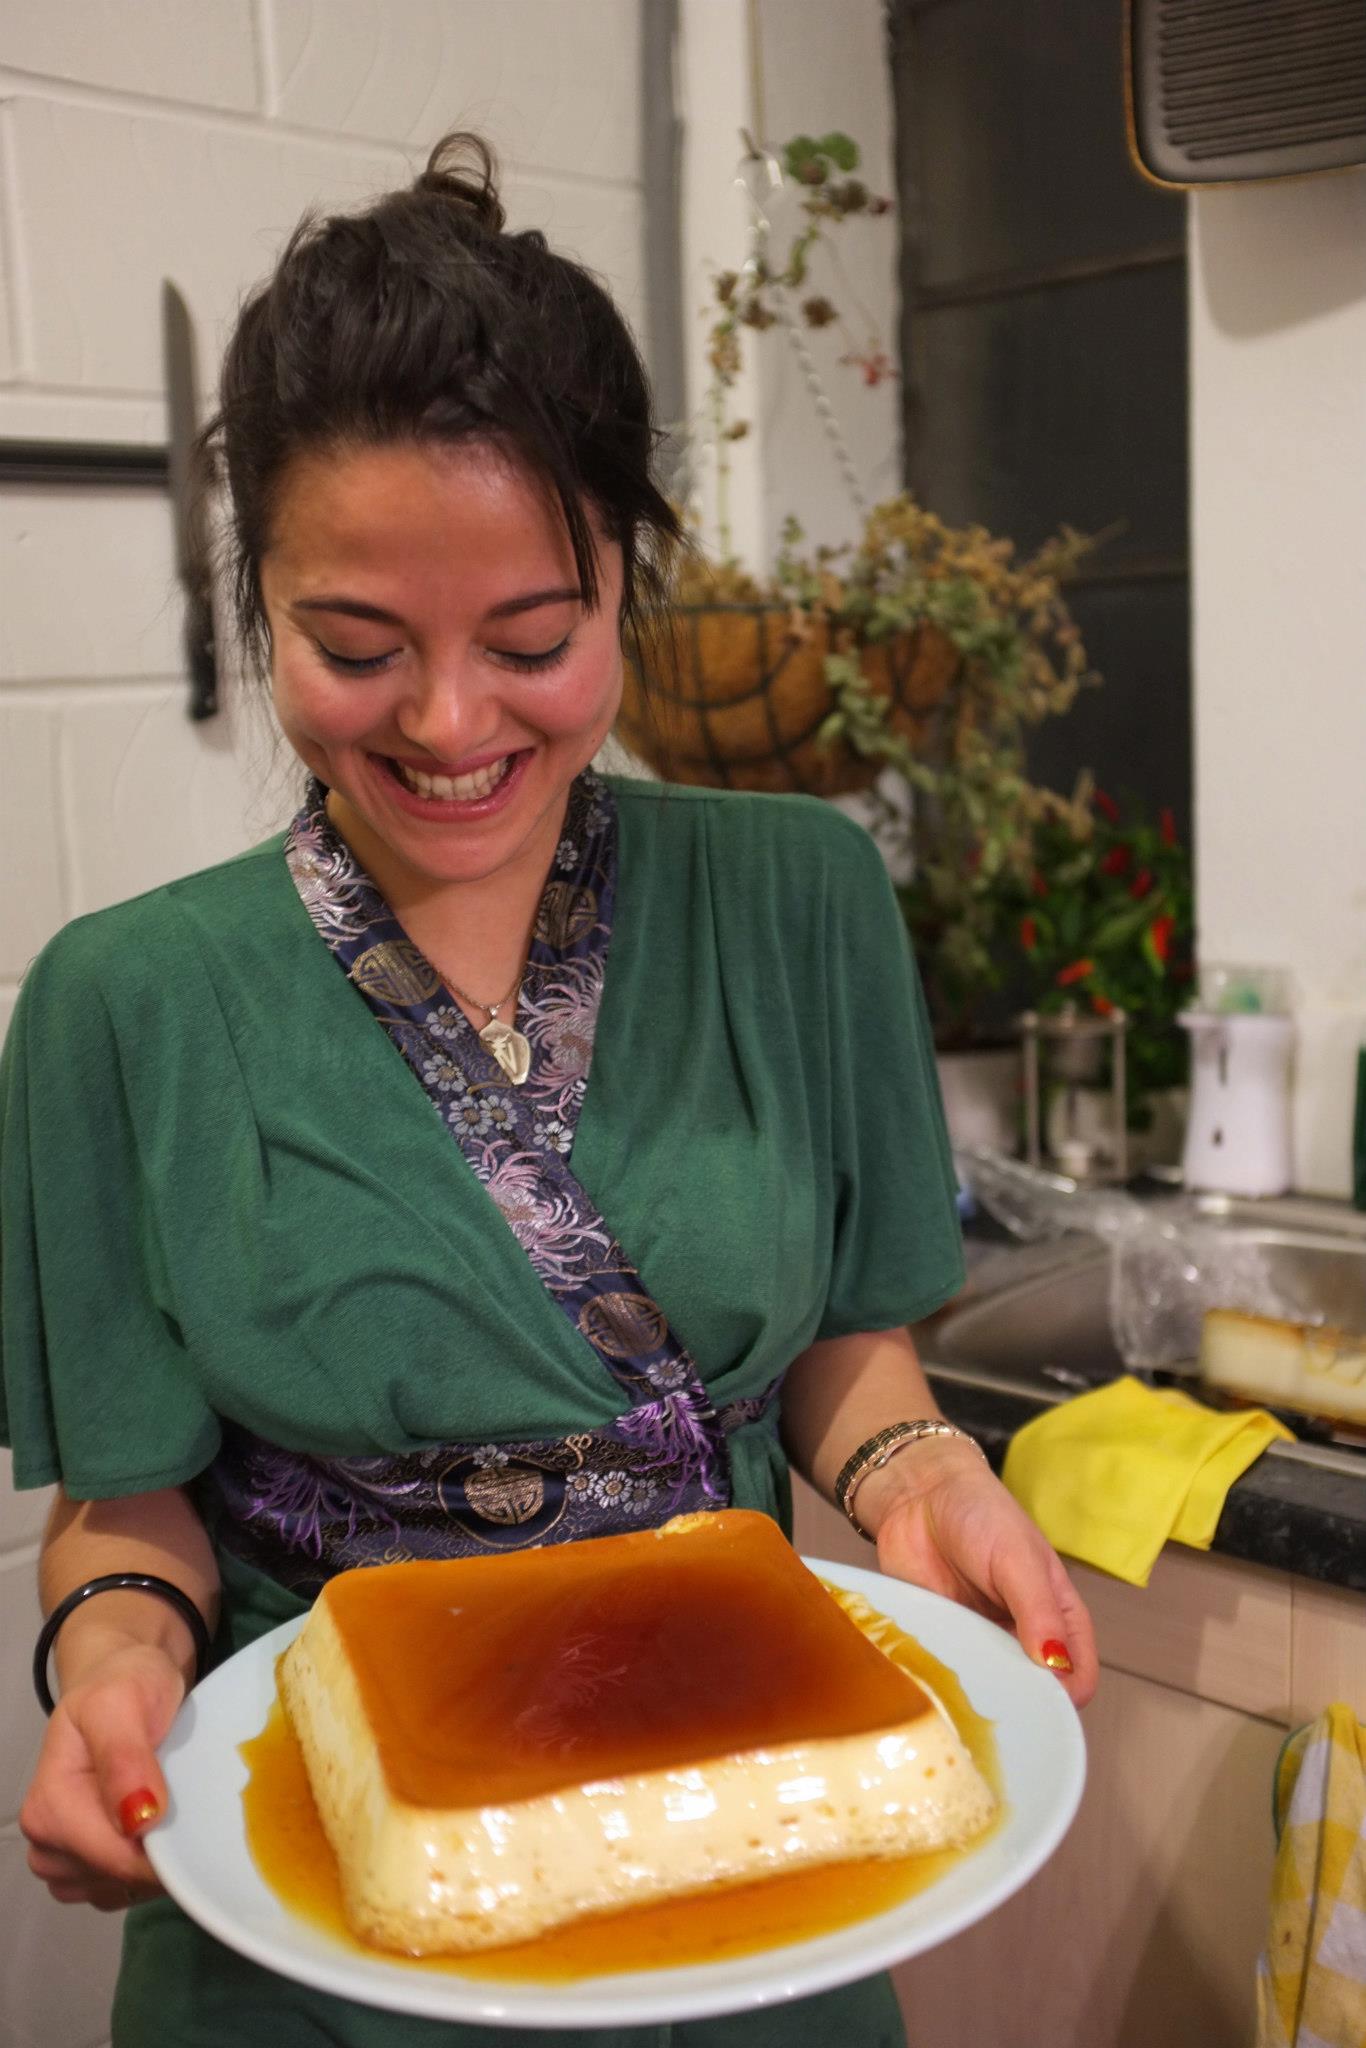
Creme Caramel. Otherwise Known As: Caramel Flan V2

Creme CaramelSo a while ago as I was doing the New Year’s Detox I wrote about this mega easy caramel flan I made for my family over Christmas back in Hong Kong. It went down a treat, but for my Mother and myself it just wasn’t the soft delicious delight we were hoping for. Which made me try rather a lot of creme caramel recipes of late and I’ve been working on one that is not only soft and delicious, but doesn’t liquify upon turning out. It’s probably not *perfect* but it seems pretty fool-proof so far so I thought I’d share it. I made a massive one of these to finish off my Chinese New Year party (and probably my guests too), and I’ve also tried substituting the milk for not only rice milk, but soya as well, and I’m pleased to report that it works superbly.

Makes enough for 6-8 ramekins.

Caramel Flan V2:
115 g caster sugar
1 tbsp water
625 ml milk (or unsweetened dairy free substitute)
1 vanilla pod or 1 tbsp pure vanilla extract
100 g caster sugar
3 whole eggs
3 egg yolks

Oven at 170°C. Get a heavy bottomed non stick pan on to high heat. Into this add the 115 g of caster sugar and the tablespoon of water. Caramelise your sugar and be careful not to burn it, I like to just let it sit for ages taking in the heat while I work on other things. I’ll only start to stir with a metal spoon right at the end browning process.

While the caramel’s on the stove, put your ramekins in a deep enough tray to use as your water bath. But without any water in it for now, put it in the oven so your ramekins take on a good amount of heat. This is so when we spoon the caramel into them it doesn’t seize up.

Take your tray of hot ramekins out of the over when your caramel’s about done, then quickly and carefully spoon about a tablespoon of caramel into all the dishes. Move them about a bit to evenly coat. Set them aside.

In another pot, bring the milk and vanilla to just below boiling point. If you’re using a whole vanilla pod, don’t forget to slice along it length wise. When at heat remove from stove and set aside.

Get a large glass bowl and mix together all your eggs and the remaining sugar. To this use a fine mesh sieve and quickly whisk and incorporate the hot milk. When it’s all mixed together you may get a lot of foam on your custard mix. I like to place a kitchen towel on top to remove this.

Ladle some custard mix into each of the ramekins. Remove any extra bubbles with the kitchen towel as above. Place all the ramekins in the water bath tray and fill it with some boiled hot water so that it’s at least over the half way point of the ramekins. Now into the oven for 20-35 minutes.

The creme caramels should have some wobble in them still, but set. Some may have a solid skin atop of them. If you’re really fussy (I am) and the top membrane is thick enough, carefully remove this then let them cool and get them in the fridge ready to be served. The longer you leave them in the fridge the better I think because the caramel dissolves more. When you’re ready to serve, run a sharp knife all the way around and turn it out on a plate.

And that’s it! This also brings an end to all the dishes I made that snowy sunday evening to usher in the Year of the Snake. So I’ll be on to regular kitchen experiments from now on.CNY Flan

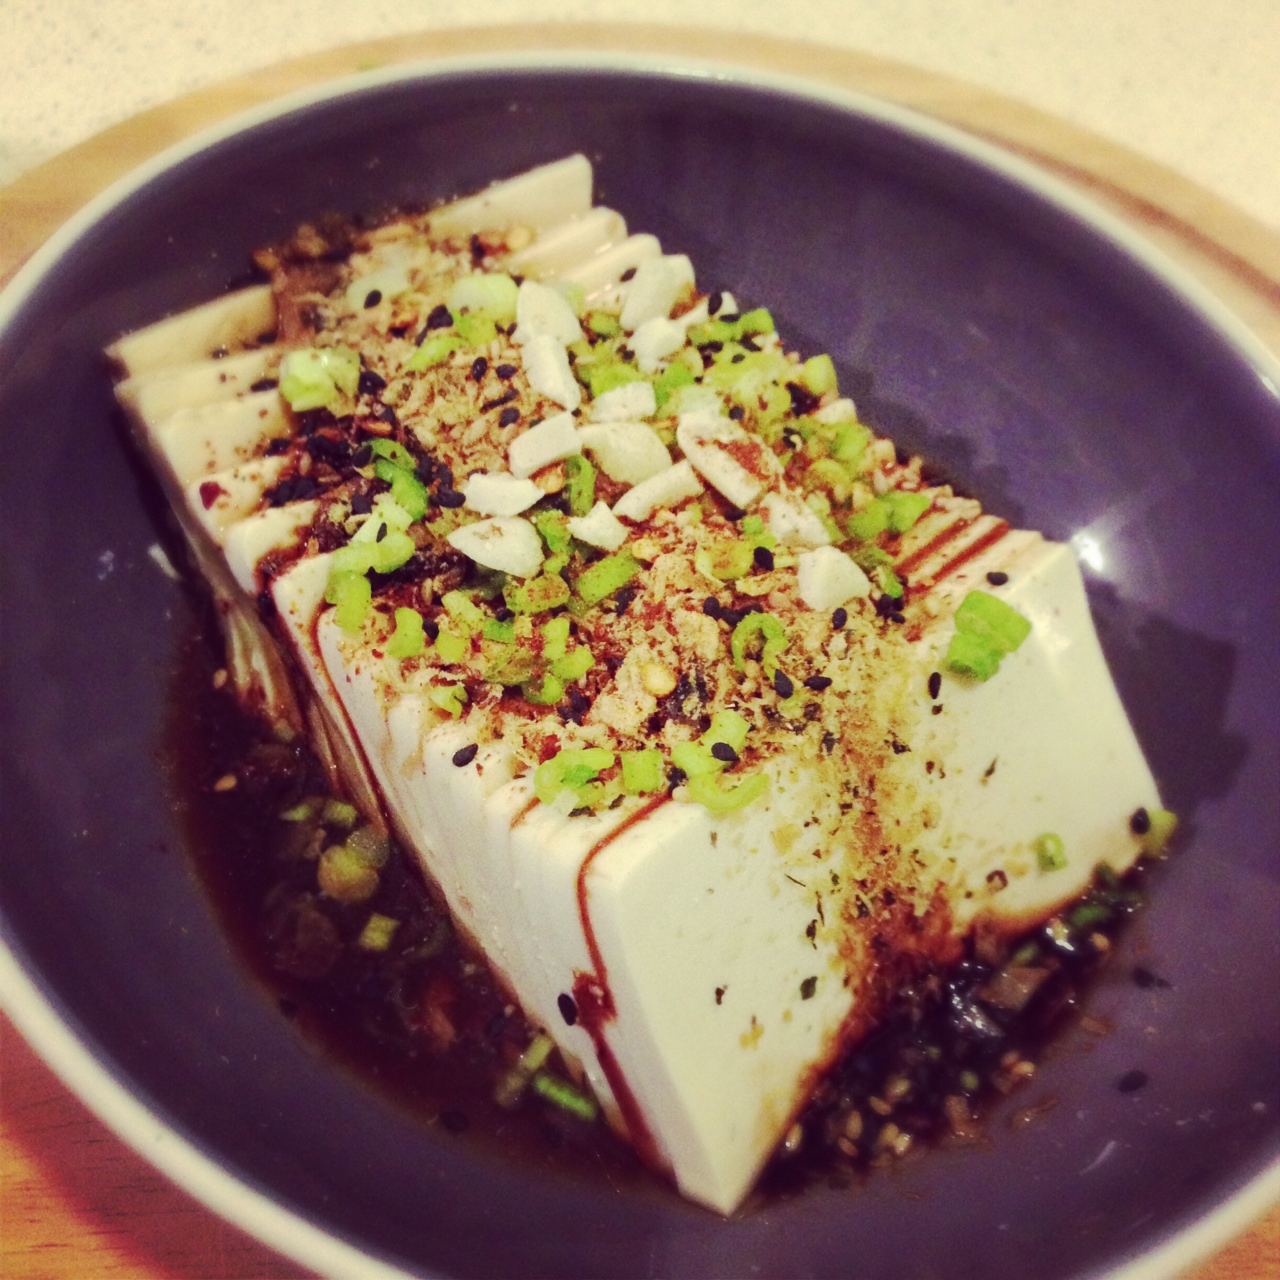
Simple Cold Tofu – 冷豆腐

Cold TofuHappy Easter everyone! It’s sunny and I’ve had a pretty eventful and relaxing break. What more could you ask for? House parties, brunch, museums, coffee, catchups, drinks, potluck, cleaning, DIY, bookkeeping….*tick tick tick tickety tick*

So my excuse for the lack of posting was that I was actually in the Alps snowboarding and drinking hot wine with friends in this beautiful winter wonderland magical paradise. I’m not going to lie, it was amazing and sadly I’m already starting to forget that delicious feeling of breathing in frosty air. Prior to my week off in the snow I went to nutritionist who not only put me on a probiotic replacement therapy course, but also kindly informed me that I should avoid wheat and dairy for a month…to which I simply replied:

“But, I’m going to France!”

It was tough, but I think I did alright (a mad crazed fondue incident aside). Which brings me neatly (not really) to this popular tofu dish that I make all the time, which made not one but three appearances during my Chinese New Year shin dig. And happily for others out there who are vegetarian, wheat and dairy intolerant, you too can make and consume this dish.

Simple Cold Tofu:
A packet of silken tofu - firm or soft good
Spring onions - finely chopped
2 tbsp light soy sauce (GF if poss)
2 tsp dark soy sauce
(GF if poss)
2 tsp Sesame oil
1/2 tsp Fresh ginger - grated
1 tbsp mushroom floss
pinch chilli flakes or fresh chilli
pinch sesame seeds
1 tbsp roasted peanuts - crushed

If you have time to kill, the following will make the tofu even silkier and remove some of that out-of-a-box taste. It’s not necessary, but it’s nicer. Get it out of its packaging and place it on a small plate. Boil a pot of water with enough water to submerge your tofu. Once boiled, remove the pot from the heat and submerge the tofu and plate for 20 minutes. Drain, and set it aside to cool. You can put it over ice, or whack it in the fridge, it’s up to you.

When you’re ready to serve, slice the tofu thinly, drizzle with the soy sauces and sesame oil, get the spring onions on. Add the chilli, grated ginger, sesame seeds, peanuts and mushroom floss*…

*Okay, I probably need an aside is needed for this little addition. This is the vegetarian version of ingredient that for health/religious reasons my mum no longer really eats so I get gifted the veggie version whenever I go back to Hong Kong. But for those of you relatively au fait with Chinese or Thai snack foods, the following statement is irrefutable: Pork floss is delicious.

If you have never heard of pork floss, it is *exactly* as it says on the tin. It’s seasoned pork that’s spun into a savoury meaty candy floss. I don’t know how they do it, but it’s that kind of black food magic which makes the world go round. Go try some. Preferably on those moorish spicy rice crackers…who do I know in Thailand at the moment to get me some?…who…do…I…

…hang on. Sorry I got side tracked. Basically, you get it. This tofu dish is supremely adaptable. If you’ve got your three main flavours of soy, sesame oil and spring onions, you can add essentially anything you want. Be it crushed garlic, a splash of black chinese vinegar, a raw quail egg, natto, grated yam, umeboshi, grated carrot, a thousand year old egg, coriander. Maybe not everything I’ve listed at once. Experiment and make some: it’s simple.

Tea Eggs – 茶葉蛋

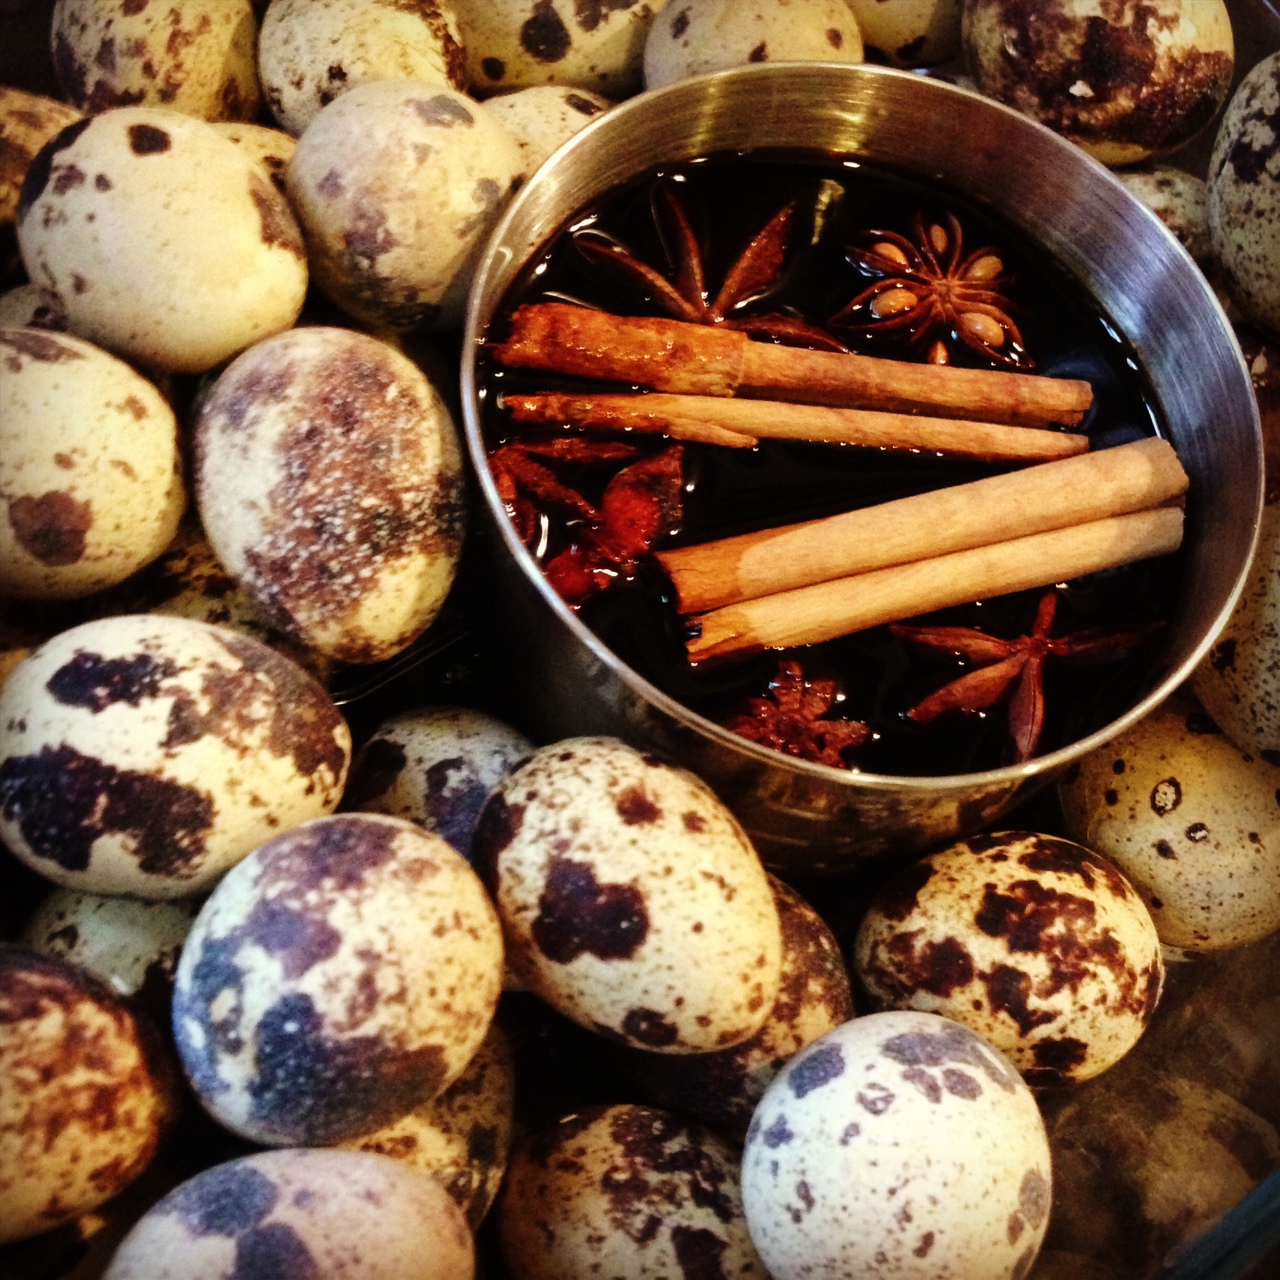
Tea EggsI love tea eggs, they’re so yummy, the smell of them cooking reminds me of home, and they look so pretty with their marbling. For Chinese New Year I made quail egg versions so guests had little tasty morsels instead of a whole chicken egg. Traditionally you leave the shell on and peel it when you want to eat it, but I didn’t want my friends faffing around with all that peeling. I’m not sure, however, that I would recommend peeling 36 quail eggs…

Below is a recipe for 6 chicken eggs or 18 quail eggs.

Tea Eggs:
500 ml of water
1 cup light soy
1 tbsp dark soy
2 tsp of sugar
3 pieces of star anise
2 generous tbsp of black tea
Stick of cinnamon
A pinch of white pepper
A pinch of black pepper

Put a pot on the stove and start boiling the water. Wash your eggs and place them in to boil. If using chicken eggs – boil for 8 mins; Quail eggs – 2 minutes. When they’re done, remove them with a slotted spoon and let them cool off until you can handle them. With the back of a metal spoon you want to gently bash the eggs all over, you don’t want to pierce the membrane just beneath the shell though, so don’t get too carried away. I think smaller cracks are prettier.

While you’re doing this add the soy sauce and all the other ingredients to the pot of just boiled water and bring it all to a boil again. Simmer the tea leaves for 5 minutes.  Now add your pre-cracked eggs and turn the heat off. Remove the pot from the heat source and let it cool to room temperature. Once cooled, decant everything into a large enough sealable container and steep them in the fridge for at least 8 hours. The longer you leave them. The better they taste.

quail eggs

Red Cooked Beef Shin – 紅燒牛腱

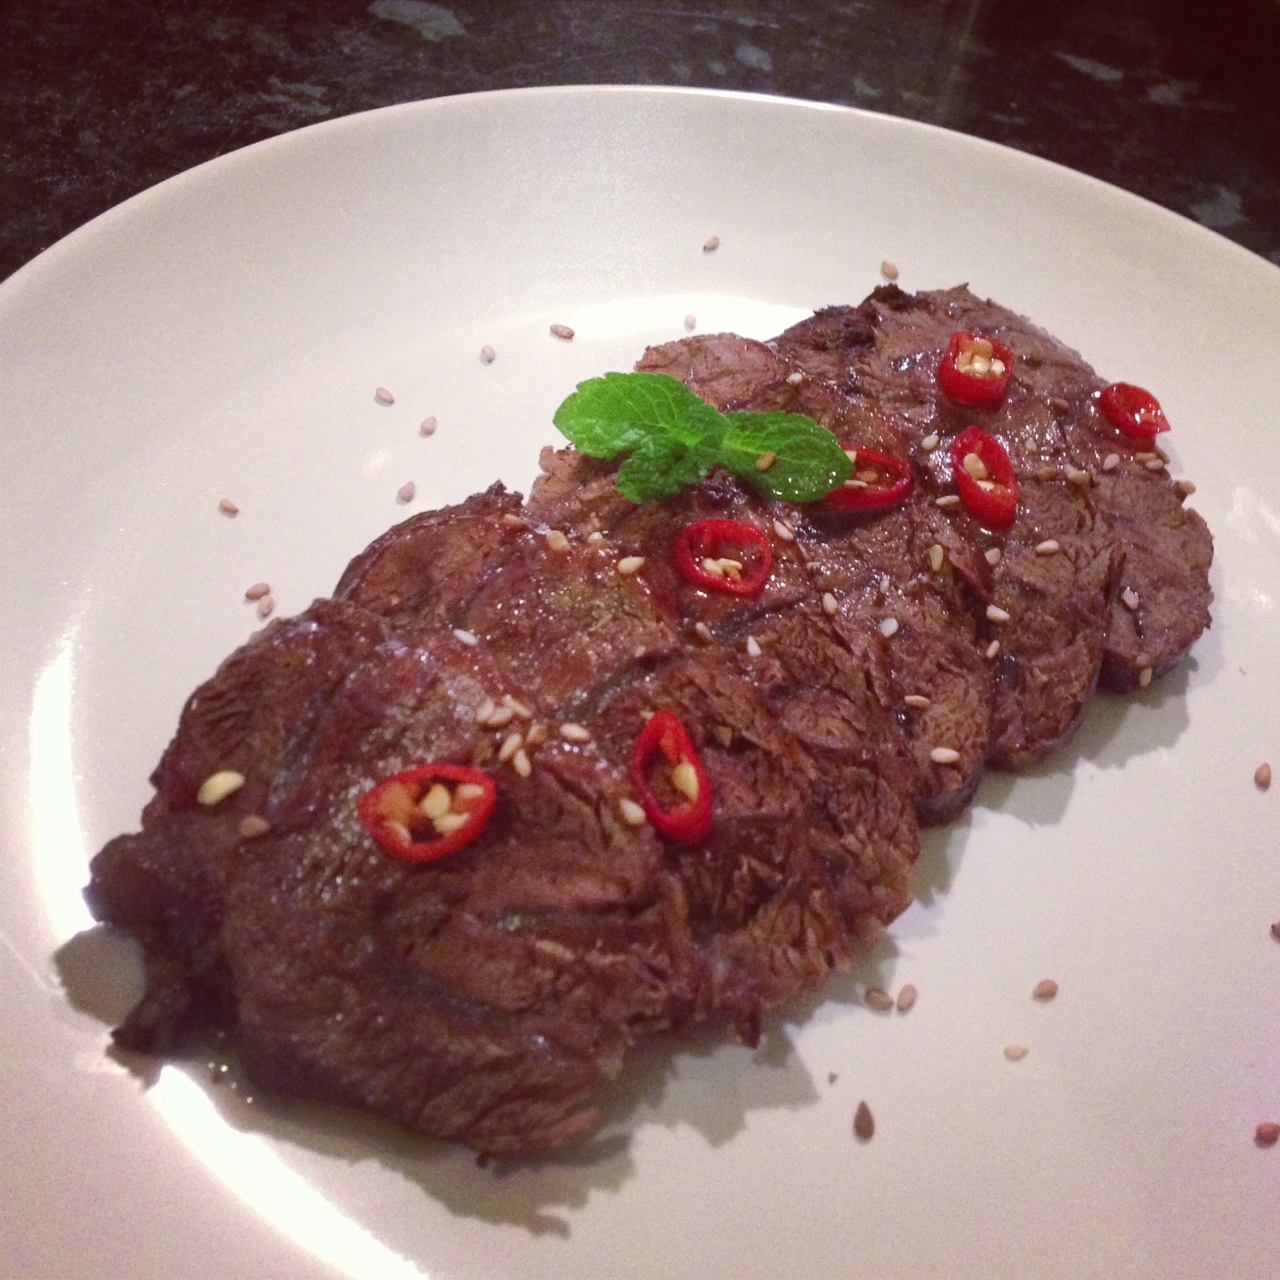
red-cooked beef shin

Whenever my mum throws a party, there are staples that family and friends expect to be served. Of these are drunken chicken wings, and red-cooked beef shin or turkey gizzards (which may sound totally horrific to those uninitiated, but my god, gizzards are delicious). So this Chinese New Year I decided on the beef shin and found myself making a large pot of aromatic red broth to braise my meat. I actually tried to source some turkey gizzards, but I think all the local butchers I called around thought I was a bit loopy. Oh gizzards. I shall find you one day.

I remade this again last night because my guests who were as quick and hungry as gannets gobbled it all up before I could take a picture. I doubled this amount to be a bit of a nibbly appetiser for around 20 people. So, below will probably be a starter to serve 4?

Red Cooked Beef Shin:
700 g beef shin
5 or 6 shallots - roughly chopped
1 tbsp vegetable oil
Peel of an orange
2.5 cups cold water
1/2 Shiu Hing (brown) cooking wine
1 cup light soy sauce
3 tbsp rock or granulated sugar
1 tbsp Sichuan peppercorns
1 tbsp star anise
1 stick of cinnamon
1 tbsp whole cloves
1 tbsp fennel seeds
1 tsp liquorice powder
A drizzle of sesame oil to serve

Get a colander in the sink. Rinse the meat in cold water, trim some of the outer fatty bits if you must. Then take some boiling water and douse the meat to seal it a bit.

Chop your shallots fry them in a bit of vegetable oil until fragrant – remove and save for later. With a peeler, peel the orange rind off in one long spiral. Now get a pot and put the water, soy, sugar, shallots, orange peel and and spices (basically all the ingredients but the sesame oil) into it. You want the pot small enough that when you add the beef it is completely submerged in the braising liquid.

Shin in and bring it to a boil, after 5 mins turn the heat right down to a simmer. Notes from my mum said ‘braise for at least 40 mins until tender’. I ended up simmering it for 2.5 hours. You want to check the water level is always submerging the meat, and maybe flip it around every so often so all sides get infused with the flavour. Check tenderness with a skewer, it should be soft enough to melt in the mouth but still have structure when you slice it.

The absolute best thing about slow cooking with shin is the ribbons of tendon and fat which render down into impossibly guilty deliciousness. You can just about see the marbling in the photo above.

Once tender, remove the beef from the braising liquid and let it rest for 15 minutes. Now thinly slice against the grain of the meat and serve with a drizzle of sesame oil and a splash of the red braising broth. If I were to be a bit more organised about this, I might even scoop some of the red broth out into a smaller pot and reduce it down into a thicker dipping sauce. So maybe you wanna do that if you have time.

Spicy Chinese Pickled Cabbage

Spicy Chinese Pickled Cabbage

Happy Year of the Snake everyone! Last week my little kitchen was burning the candle at both ends to get some delicious treats out for a CNY party last night, which I literally decided to throw on Monday. A surprising amount of people agreed to come considering the late notice, it being a Sunday and the snow, so a warm glowy feeling was had by ushering the new year over great food and friends. As per usual at my foodie parties, people had to be rolled out, so the following posts here at Minikin Kitchen will really be me catching up with what I cooked throughout the week ending with the on the day dumpling making sessions. Ahhh…Chinese New Year. I love you.

So. Let’s start with this spicy, sour and slightly sweet offering of chinese pickled cabbage. My veg box last thursday happened to contain Chinese Leaf (or Nappa Cabbage across the pond) as well as carrots. Serendipitous or what?  You can if you want substitute the Chinese leaf with a head of regular white cabbage, which will result in a firmer bite.

Pickled Cabbage:
1 large Chinese leaf cabbage - cut into 1.5 inch squares
2 carrots - thinly sliced into half moon shapes
4 fresh bird's eye chillies - deseeded and thinly sliced
1-2 inch piece of ginger - thinly sliced
1/2 tsp Szechuan peppercorns
1 cup of rice wine vinegar
1/2 cup granulated sugar
2 tbsp rice wine (the clear one)
1 tbsp salt

This is pretty easy side dish to prep in advance. Cut and put all the veg in a large tupperware box or jar, anything with a lid strong enough for you to shake everything up.

Heat up the vinegar and dissolve all the sugar and salt. Once it’s all dissolved add the rice wine and the peppercorns. Now add this to all the veg and shake it all up. The veg will shrink in volume over time adding loads of water to the mixture. What I ended up doing is whacking it all in a big Kilner jar and every morning and night rotate and stand the jar upside down (or right side up) to shift and coat it all. I made this on the Thursday evening and did a taste test Friday evening, so these quantities are the results of my adjustments.

Serve it up using a slotted spoon or chopsticks, you don’t want to serve it swimming in the pickling liquid. It does have a spicy kick, and although my friends enjoyed it, I’d start with 2 chillies and do a taste test a day or two in. I really like spicy food, but I’m into enjoying food not enduring it.

CNY 2013

Caramel Flan V1

flan

Gah…so January’s been eventful already! I’ve been so good with eating healthily as per the rituals of The January Detox (I’m currently eating a bowl of steamed purple sprouting broccoli…no jokes) that I started to reminisce about this mega easy flan I made for a huge Christmas feast last December.

Now there’s a reason that this recipe is called version 1, because this produces quite a firm flan with more of a bite than a creme caramel’s soft unctuousness, but it’s yummy, velvety and uses whole eggs. Which is handy if you don’t really have the time to separate your yolks and have left over egg bits. PLUS it’s probably the only non-cooking recipe I’ll post here because it uses tins of evaporated milk and condensed milk. But once I crack the perfect soft flan that doesn’t liquify on turning out, version 2 will be out with a gusto. I can promise you that.

Mega Easy Flan:
1 cup caster or granulated sugar
1 tbsp water
3 eggs
1 (14 ounce) can condensed milk
1 (12 ounce) can of evaporated milk
1/2 cup of whole milk
1 tbsp vanilla essence

Get your oven to 170°C.

Put the sugar, and tablespoon of water in a heavy bottomed pan on stove on medium heat. Without shaking the pan, wait for the sugar to caramelise. Careful not to let it burn, you can use a metal spoon to stir it all together towards the end, but in general with making caramel just leave and watch it. While it’s getting on its way to all lovely and golden, take the dish you’ll cooking your flan in (I used a 10 inch pyrex dish) and place it in the oven for a bit just to warm it up. This just stops the caramel from seizing up in a cold dish.

So once the caramel’s done (try not to place the spoon covered in liquid hotter than the sun in your mouth) carefully pour it in your dish and swirl it all around set it aside and let it cool.

In a large bowl, pour in all the condensed milk and carefully stir in the eggs. ‘Stir’ being the operative word, you don’t want to vigorously whip it all up and create air bubbles. Once throughly mixed add the evaporated milk, whole milk and vanilla essence and combine it all together.

Decant your creamy mixture through a sieve into your caramel dish. Cover with foil. Now place this into a water bath in the oven. So that’s a larger deeper oven tray filled with water until it reaches halfway up the flan dish. Bake for 60 mins. Or until the centre is no longer liquid when you wobble it a bit.

Leave it to cool thoroughly and when you’re ready to serve, run a sharp knife round it, place a plate on top and flip that flan over. Feeds 6-8.

Chinese Salted Eggs – 鹹蛋

salted eggs

I mentioned a salted egg and prawn dish I made with my Aunt a couple of weeks ago. Which aptly coincided rather neatly to my mother preserving her own eggs over Christmas.

W.I eat your heart out.

As I’ve never salted them before and my mum swears it tastes a million times better, I thought I’d get some duck eggs and give it a shot.

Salted Eggs:
6 duck eggs
3/4 cup of salt
1/2 tbsp Sichuan peppercorns
3 tbsp rice wine
3 cups boiling water

Wash your duck eggs. In a clean jar put the salt and boiled water together, stir until all the salt has dissolved. Add the rice wine and peppercorns. Wait until the liquid is room temp before you add your duck eggs. Leave for at least 1 month.

So I’ll post some recipes involving these bad boys in at least a months time. Laters.

Golden Prawns – 黃金蝦 – Prawns stir fried with salted egg yolks

黃金蝦

I few posts ago I mentioned my Auntie Ann who is a great home cook, and I realised I had to learn how to make her lotus root fritters once I went back to visit the family in Hong Kong. So since I’m here at the moment, I asked her about a cooking lesson and she was so pleased I wanted to learn, that a date was quickly set. It was only a couple of days ago that I had the pleasure of not only making said lotus root delights but also this particularly scrummy prawn dish. For those uninitiated to the salted egg yolks stir fried with prawns, I can imagine that it’s actually a pretty bizarre taste sensation. It’s creamy, mushy, salty, deliciously prawny & and has a texture a bit like wet earth. This is from the preserved salted egg yolks and it’s the earthy sensation that actually makes them *good* so don’t be too alarmed next time you try this dish at a decent Chinese restaurant. I learned loads of new techniques and was even more impressed that my Aunt can churn out all this great food on just a two hob stove in a kitchen a third the size of my own mini proportions back in London.

To make this dish you want to buy some salted eggs from your local Chinese supermarket and you’ll need about 1 salted egg yolk per 2 big ass prawns. We had six prawns between the two of us. Oh, and I guess I should give a bit of a warning here: this dish is absolutely loaded with cholesterol. But that’s what makes it so utterly delicious.

Golden Prawns:
6 large prawns with their shells still on
3 salted eggs
1 1/2 tbsp of vegetable oil - not olive oil
2 tbsp corn flour
couple of pinches white pepper
1 tbsp butter

Depending on what type of salted eggs you buy (or you know, you can make your own), they are raw inside so you want to clean off the charcoal stuff before you cook with them. Crack your salted eggs into a plate and steam them for around 15 minutes until the egg yolks are just cooked. When they are done, remove the yolks from the egg whites and put them in a small bowl. Using a metal spoon, gently cut each yolk in half and remove and discard this hard pea sized nubbin from inside (removing this is actually optional, it’s just a harder piece of yolk, my mum says keep it in – meh – sisters will disagree). With the same metal spoon roughly chop the yolks – you want nice bits to chew on so nothing smaller than a centimetre cubed. Save for later on.

Wash and prep your prawns*. Use a pair of scissors and trim the legs off, cut off the sharp front part off the head – chop off about about half an inch- and trim a bit off the tail. At the bit of the prawn where the head meets body, make about a half an inch incision along the top of the the body and remove a bit of that section either side of the body. This helps keep the prawn intact as most of it’s shell is still holding it together, but also gives the yummy egg mixture a chance to get to flavour the fleshy bits of the prawn. Now use a small paring knife and tease the black vein out of the prawn. Rinse and pat dry the now cleaned and prepped prawns with a paper towel. Stir the corn flour with a couple of pinches of white pepper and dust dust dust each prawn and set them aside.

Wok on stove to high heat with a tablespoon of oil. When the oil is good and hot, stir fry your prawns until they are half cooked. Remove prawns and set aside on some kitchen roll.

Wipe down the wok. Heat to medium high. Add half a tablespoon of oil and one tablespoon of butter. When the butter is at heat, get your egg yolks in and gently toss, it should all foam up and smell really nice. Carefully toss in the prawns and take the heat up high to finish it all off. You really don’t need to cook these for long you just want to coat the prawns and cook them through. Serve!

prawn illustration*Doodle of prawn prep

Categories